Disclosure: This post may contain affiliate links. If you purchase through one of our links, we may earn a commission at no additional cost to you.
Xyla Foxlin’s first teardrop trailer took three weeks of 18-hour days and more than $6,000. It’s still the project she names as her favorite when people ask. So she set herself a harder brief for the second one: build a teardrop for about $1,000, finish it in a single weekend, and invite as many friends as she could talk into helping.
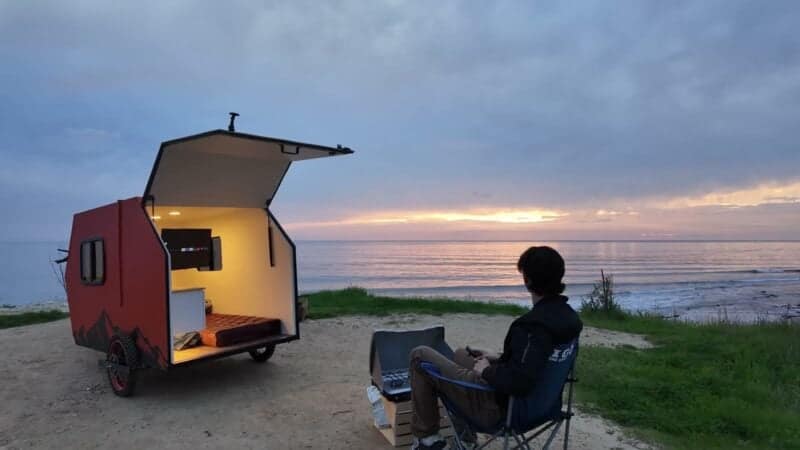
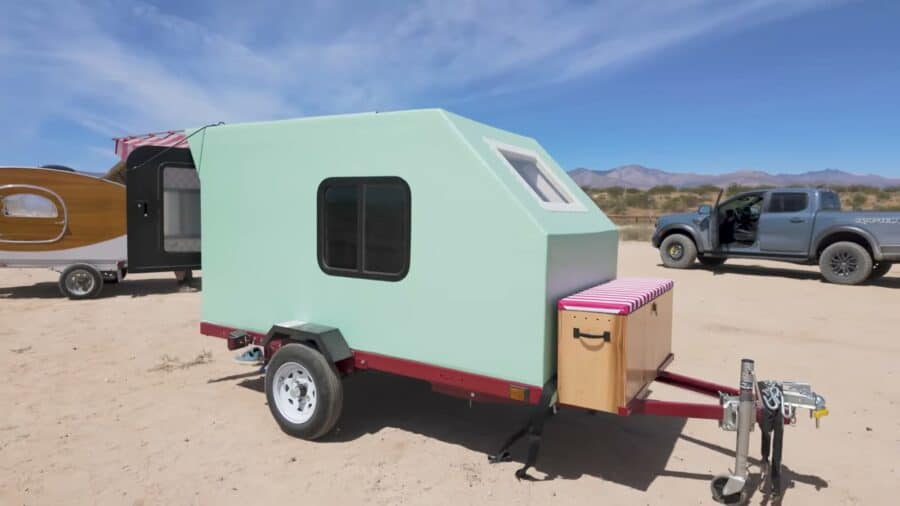
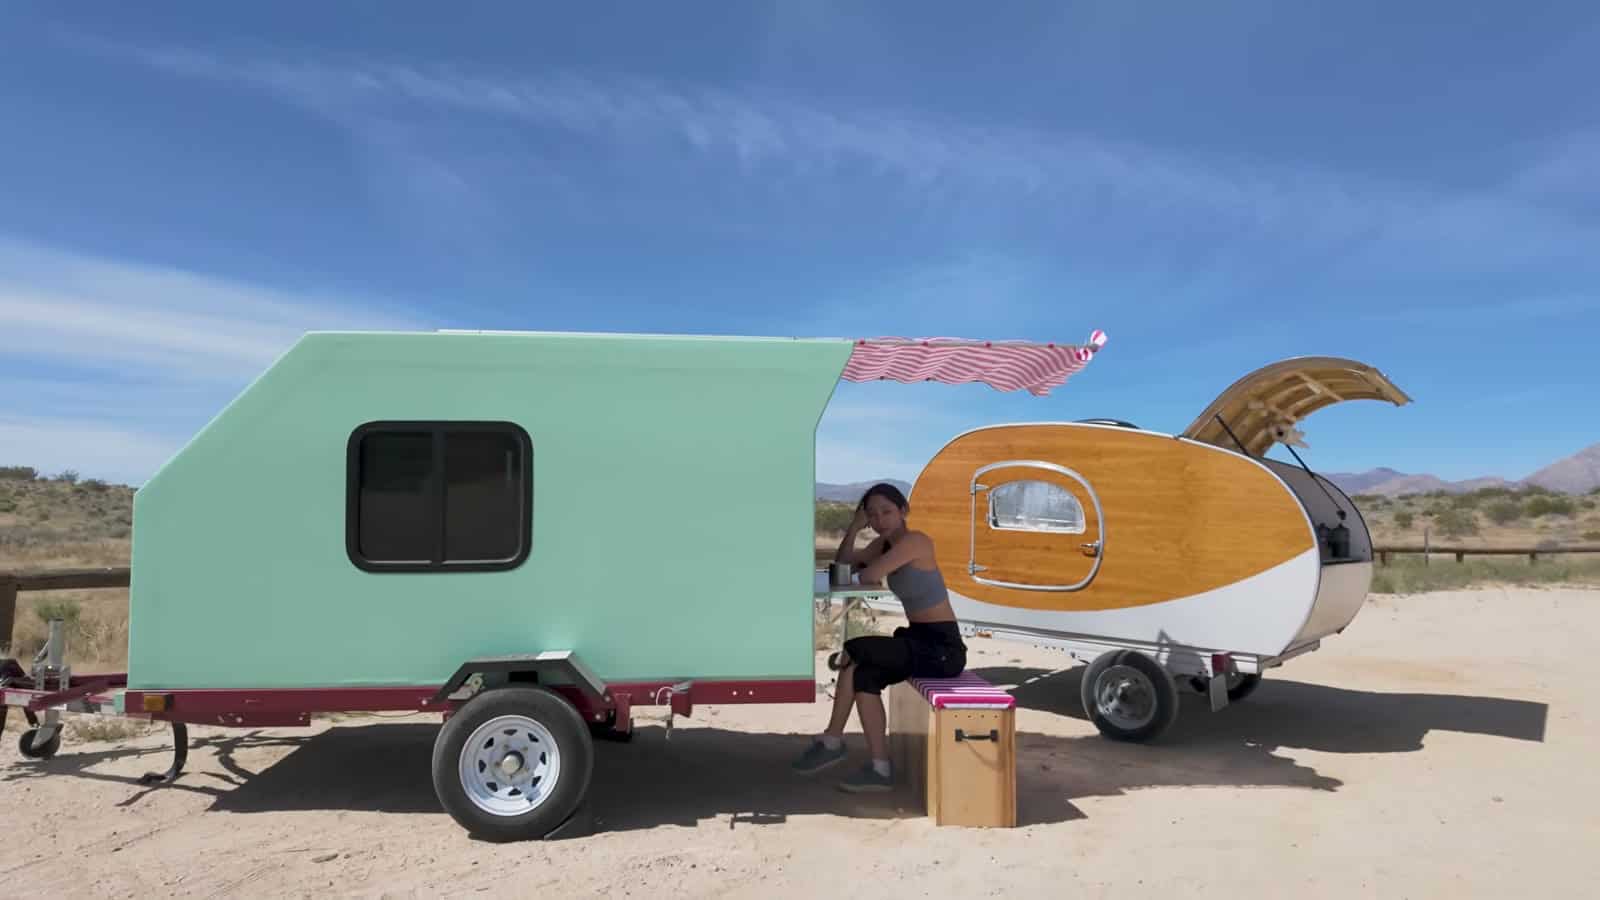
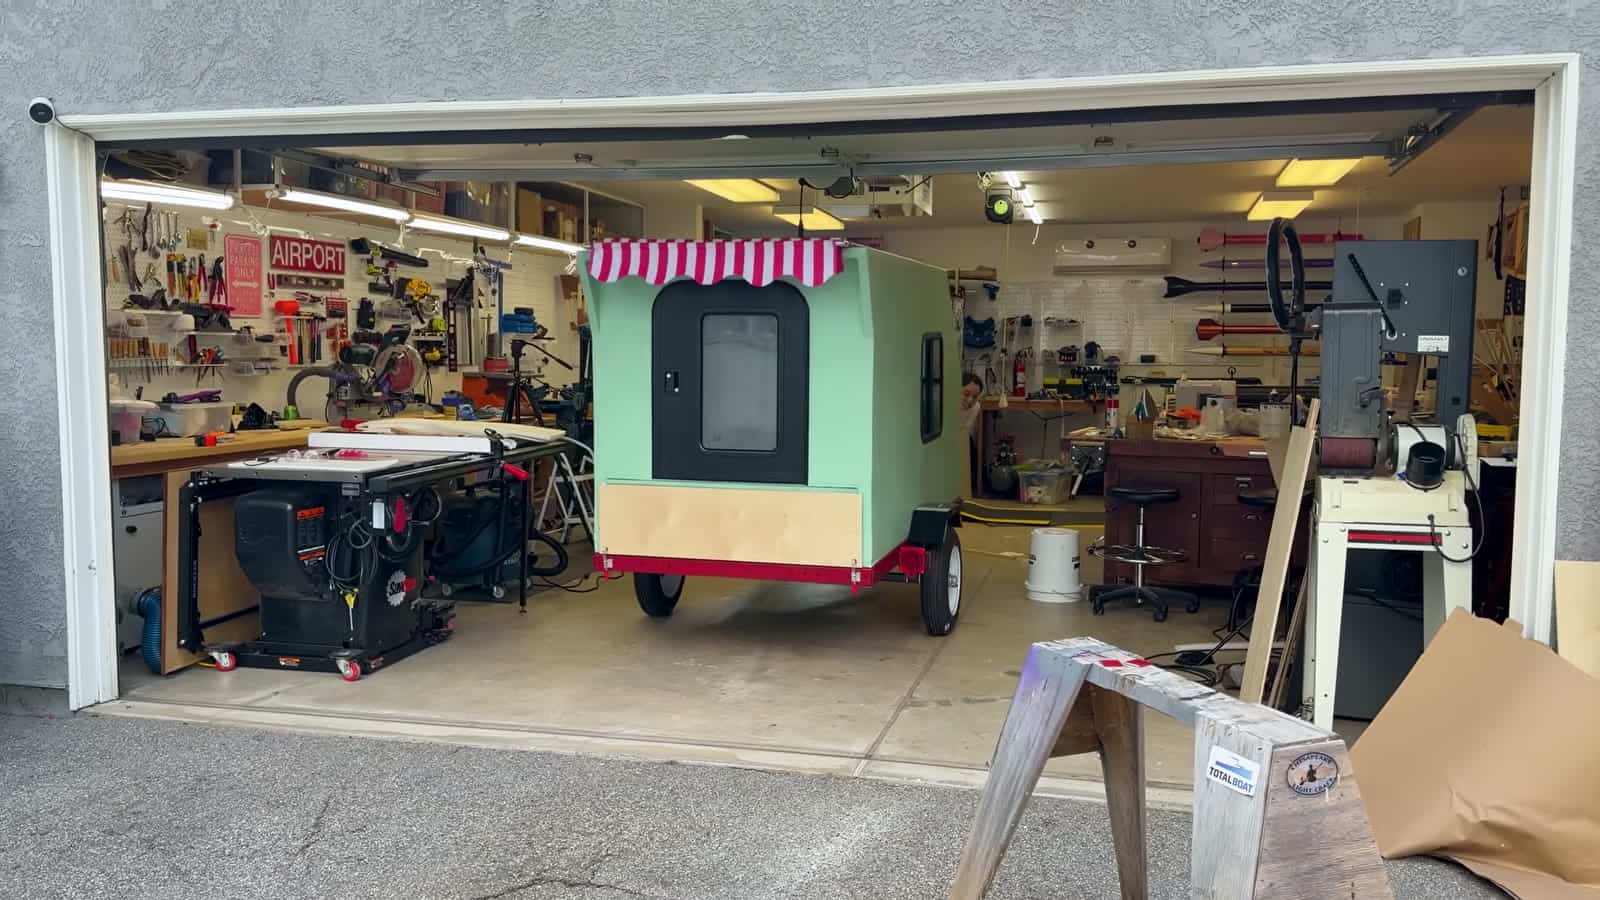
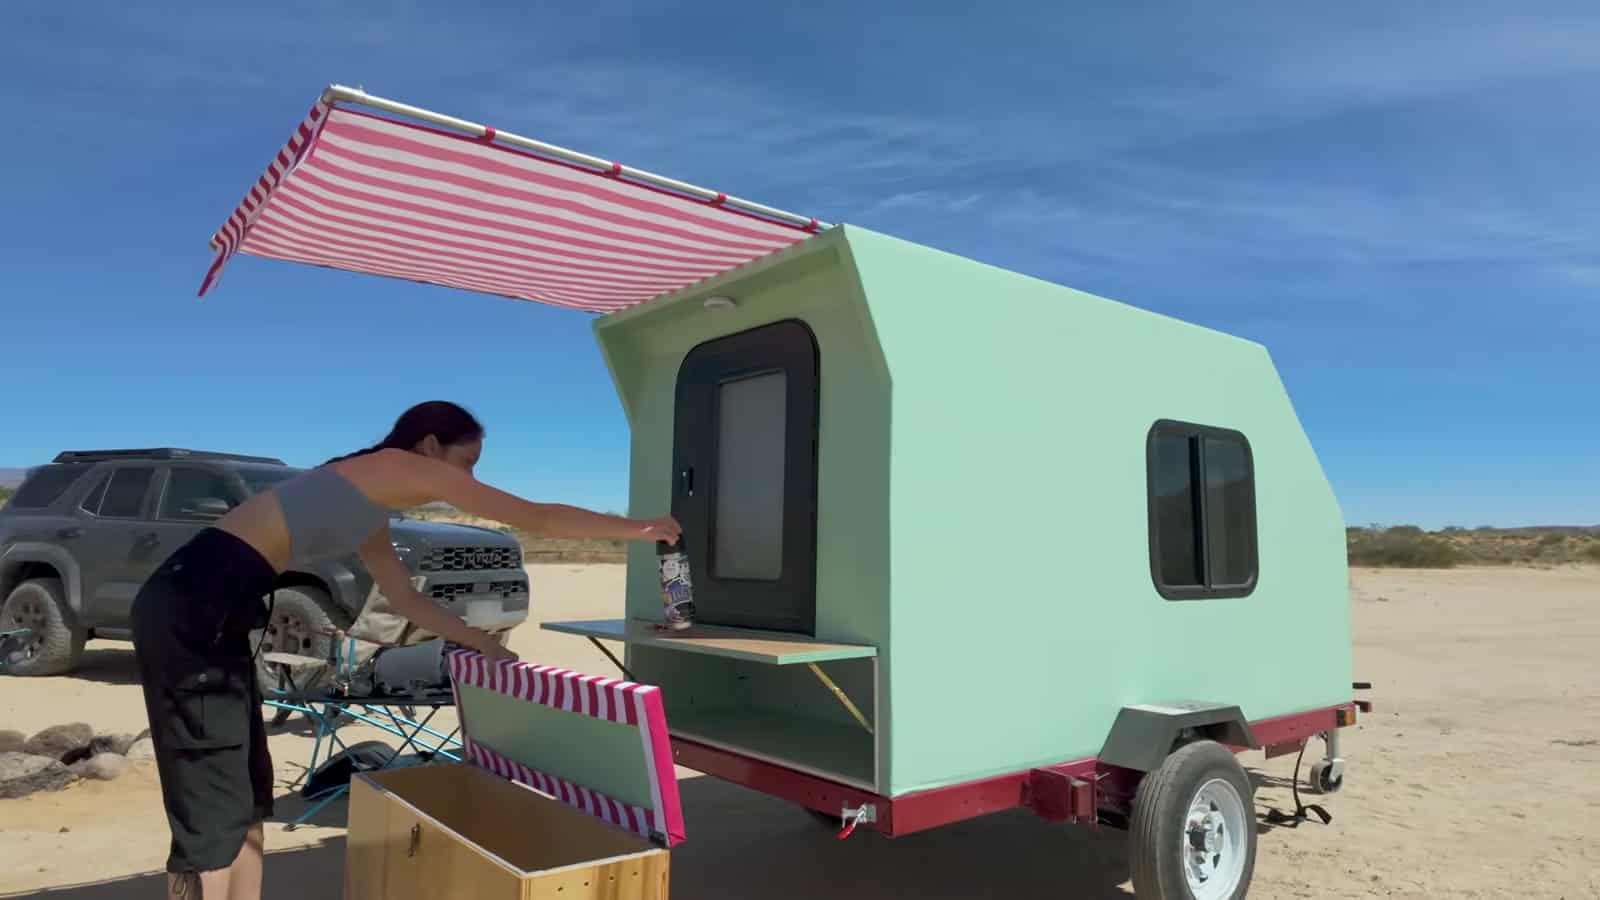
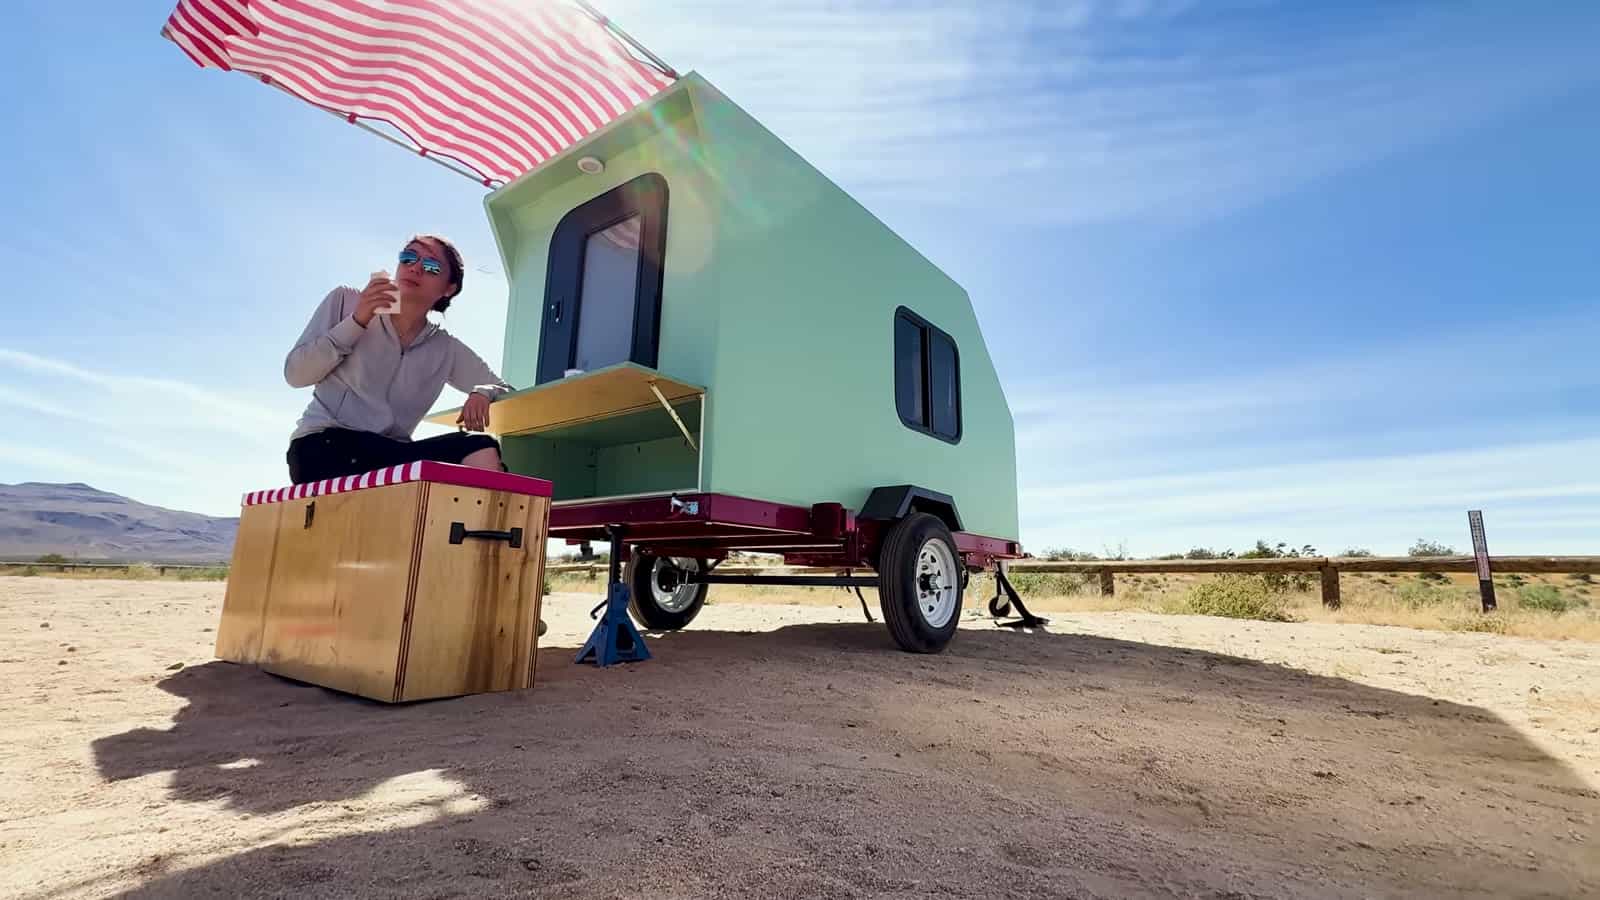
The result is a mint green “foamie,” a camper made almost entirely of pink rigid insulation foam wrapped in canvas and wood glue. It has two RV windows, a real RV door, a flush acrylic skylight for stargazing, a fold-down camp counter, a removable tongue box that doubles as a seat, and a candy-striped sliding awning made from electrical conduit. The materials came to $1,000.21, and the shell went from flat foam sheets to a closed-up camper in about 48 hours.
Images via Xyla Foxlin/YouTube
The Budget Rules (and What Wasn’t Included)
Xyla was upfront about where she drew the line. The trailer itself is not part of the $1,000, because used trailer prices vary so much by region. She couldn’t find a used 4×8 on Facebook Marketplace or Craigslist in Los Angeles, so she bought a new 4×8 utility trailer kit from Harbor Freight for about $800 and assembled it before the build weekend started. If you live somewhere less urban, a used trailer could take a real bite out of that number.
A few extras also sit outside the budget: she varnished and edge-banded the maple plywood storage box instead of painting it as the plans called for, and she used a laser cutter for the awning’s scalloped edge. Scissors would do the same job. Those are cosmetic choices. The camper itself works at the $1,000 line.

Images via Xyla Foxlin/YouTube
What a Foamie Is and Why It’s So Cheap
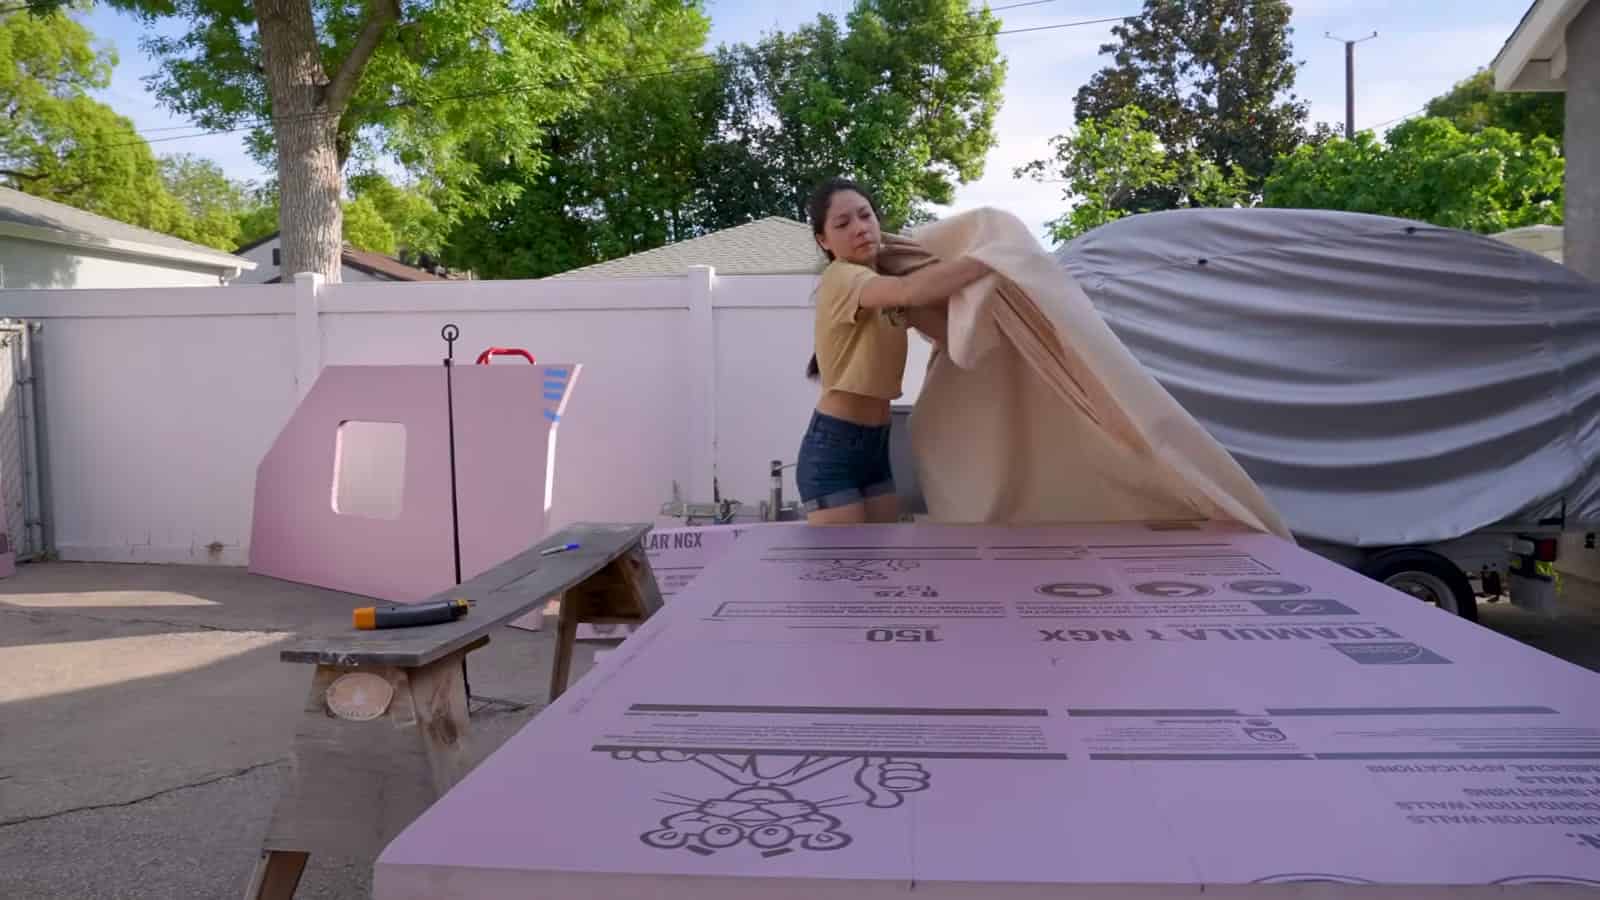
A foamie skips the wood framing of a traditional teardrop. The walls, roof, and nose are 1.5-inch pink extruded polystyrene (XPS) insulation board, the same stuff that goes under slabs and behind basement walls. Four 4×8 sheets cost $133.56. The foam is light, insulates well, and cuts with simple tools.
On its own, foam is fragile, so it gets a skin of “poor man’s fiberglass” (PMF): cotton duck canvas glued down with watered-down Titebond II wood glue, then primed and painted. Once it cures, it works like fiberglass cloth and resin, at a small fraction of the cost. Xyla has done plenty of real fiberglass on her channel, but this was her first PMF project, and she’s clear that the video shows friends figuring it out as they go rather than gospel.
Images via Xyla Foxlin/YouTube
Three Teams, One Weekend
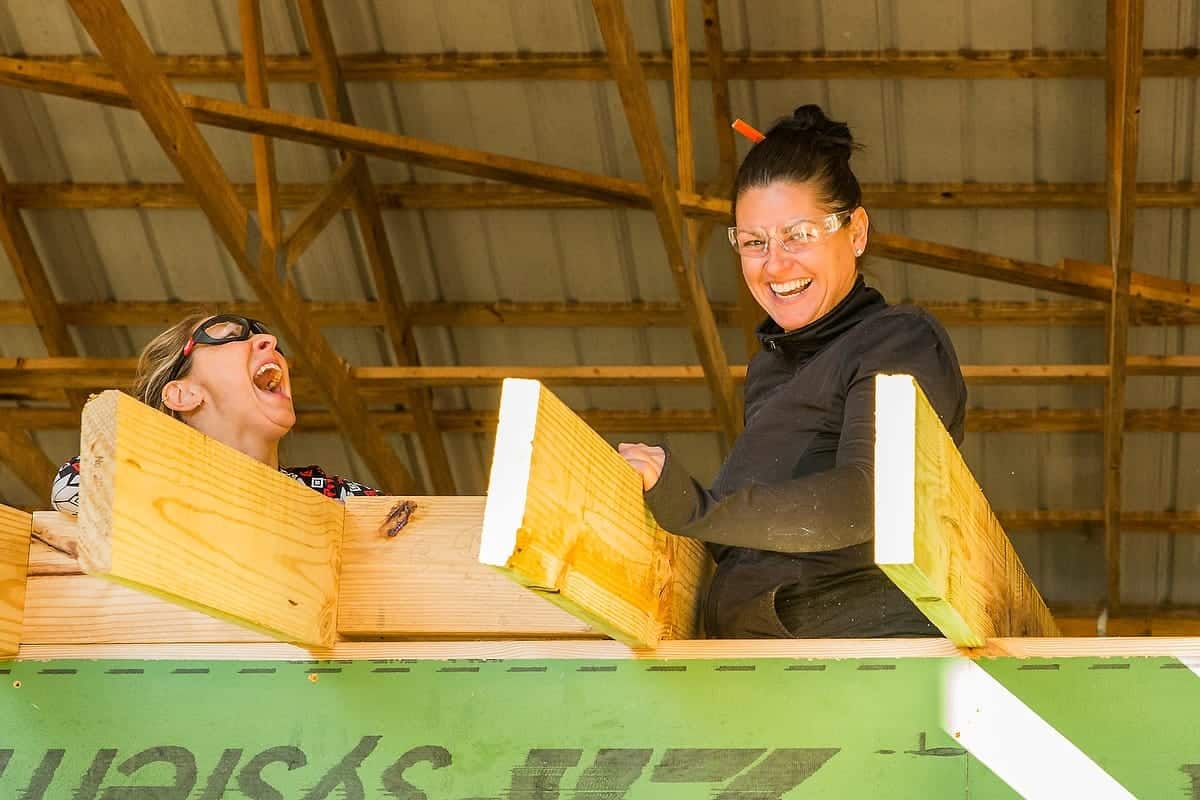
To make the deadline work, her friend Madeline, a former technical project manager from Disney who showed up in a referee shirt, split the crew into teams. Team one handled the plywood, team two the foam, and team three finished the trailer. Friends rotated in and out all weekend from a come-when-you-can party invite.
The budget allowed for just two sheets of plywood. One became the 23/32-inch sheathing base that bolts to the trailer, which got several coats of exterior paint because it faces the road. The second sheet, 3/4-inch maple ply, had to cover every other wood part, so Xyla used it for a single kitchen storage box rather than a full galley.
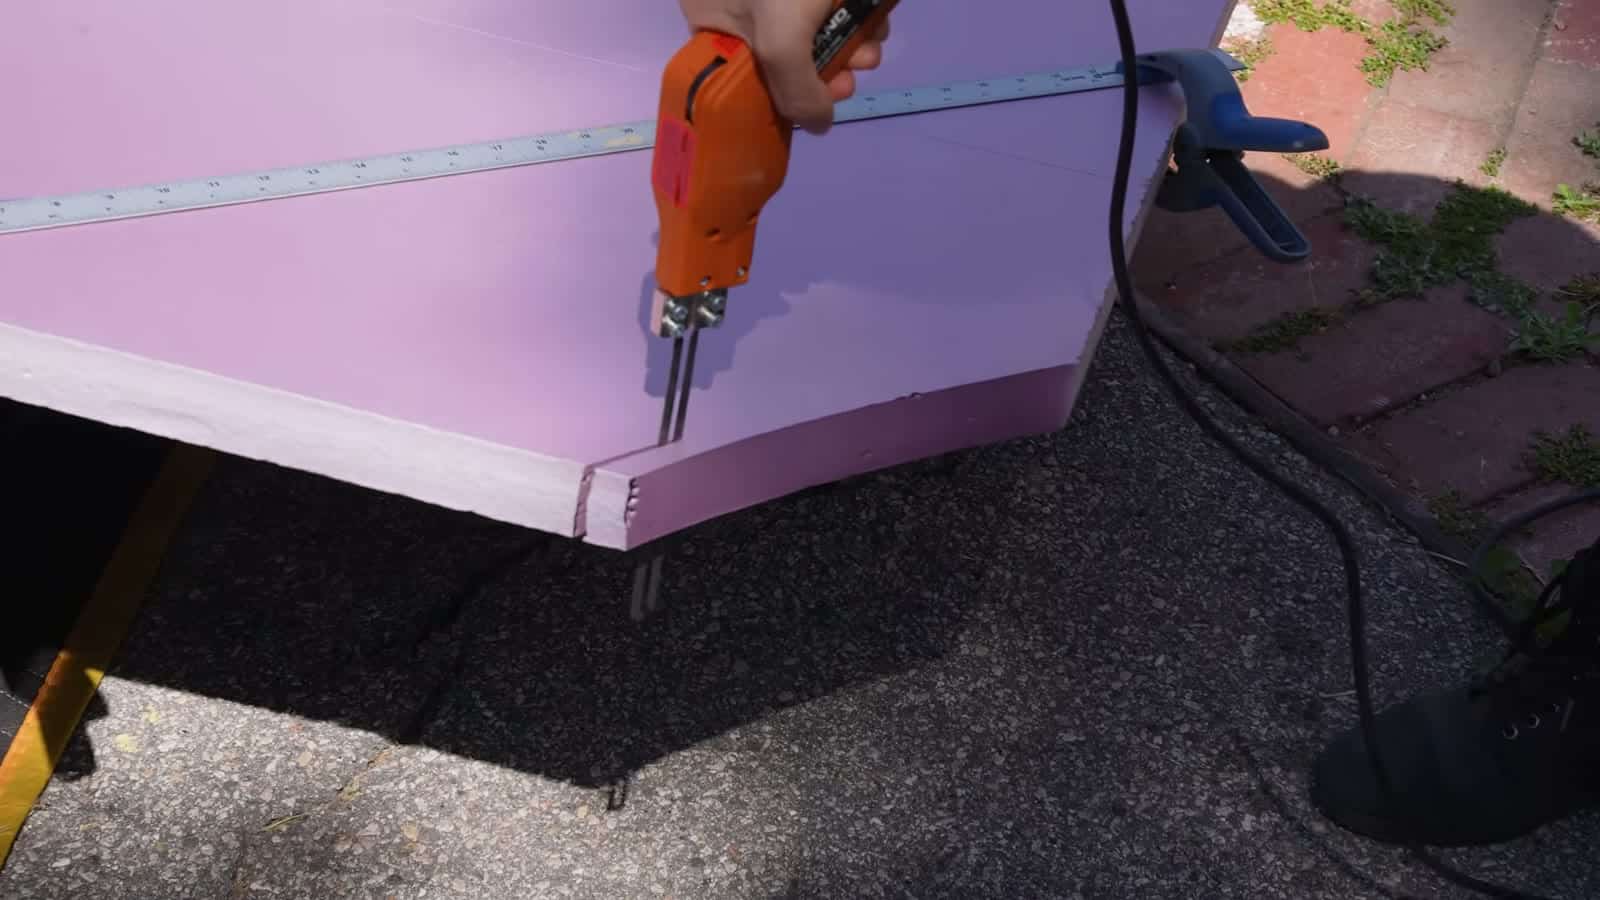
Foam cutting went quicker than expected. A hot knife worked, but jigsaw blades made specifically for foam left the cleanest lines. The little triangular fins that sweep off the back of the roof took extra effort, and she calls them the feature that gives the camper most of its character.
Images via Xyla Foxlin/YouTube
Testing Adhesives Before Committing
This is one of the most useful lessons in the video. Several foamie builders online recommend a spray foam adhesive, so Xyla tested it on scrap first. It ate straight into the foam. Expanding foam was no good either.
What worked was Loctite PL 300 foamboard construction adhesive, which neither expands nor melts XPS. She was surprised she hadn’t seen it mentioned in any of the foamie guides she’d read. Anyone planning one of these should test every glue, paint, and primer on scrap foam before it touches the real panels.
Images via Xyla Foxlin/YouTube
The Poor Man’s Fiberglass Recipe
Xyla applied PMF to the inside face of each panel while it was still flat, which is far easier than working inside a closed box. She cut the canvas back 1.5 inches from each edge so the panels would meet foam to foam at the glue joints. Her process:
- Roll on a 50/50 mix of wood glue and water.
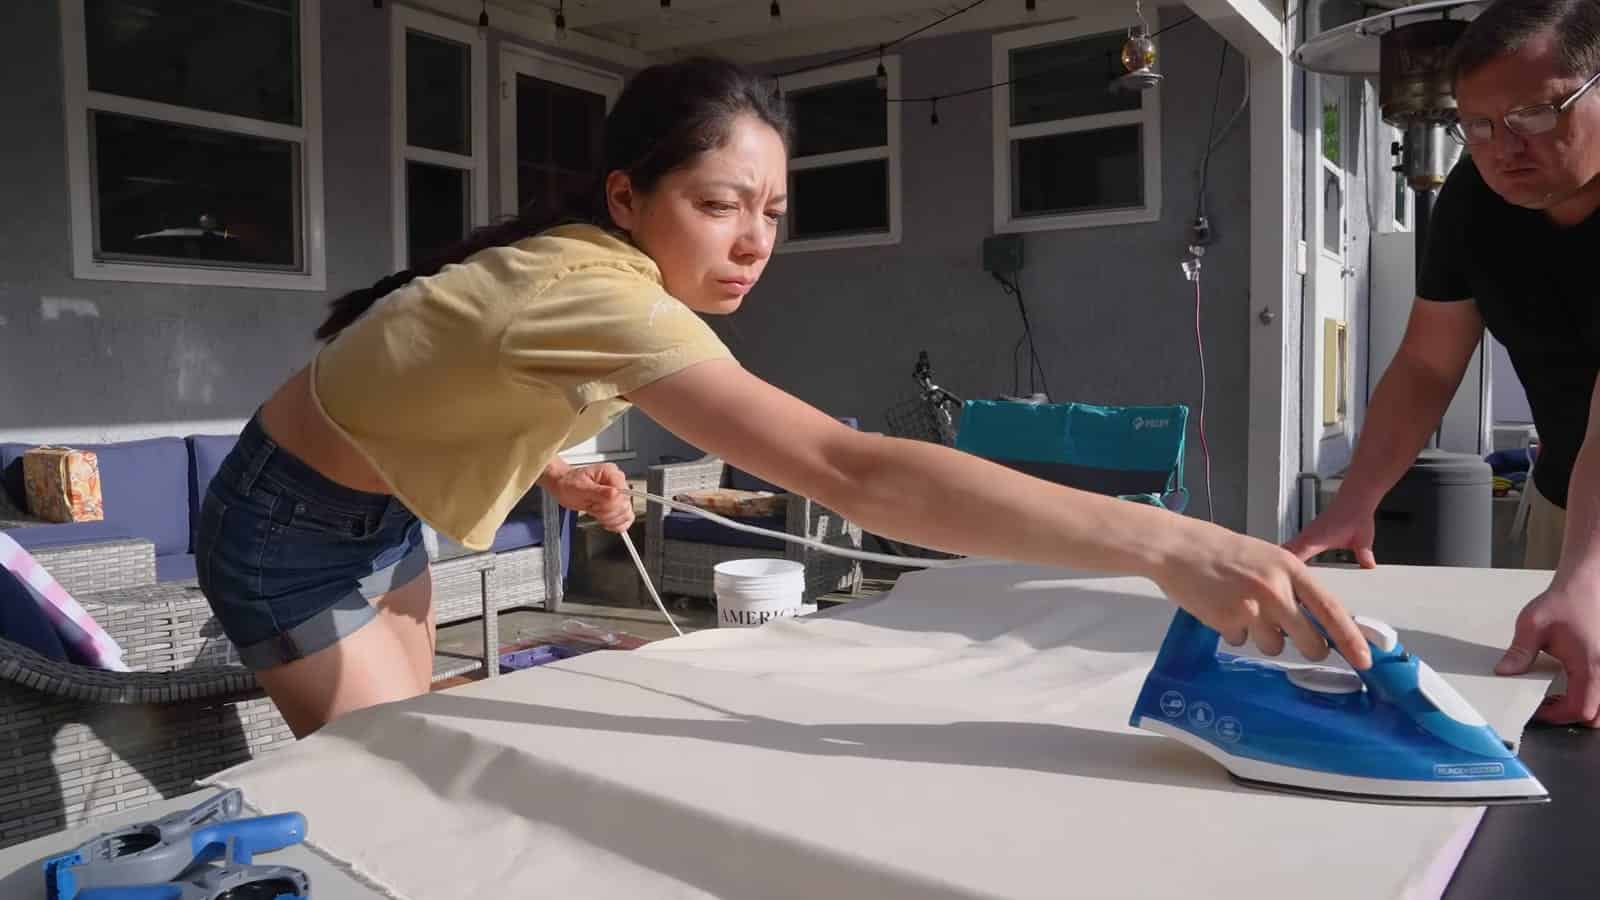
- Lay the canvas down and iron it smooth. A household iron isn’t hot enough to melt the foam, and it gets out wrinkles that hands alone can’t.
- Once dry, roll on a second coat at three parts glue to one part water.
- Follow with three coats of primer: 50/50 primer and water so it soaks into the weave, then 3:1, then straight primer.
- Finish with exterior paint. The camper got three coats.
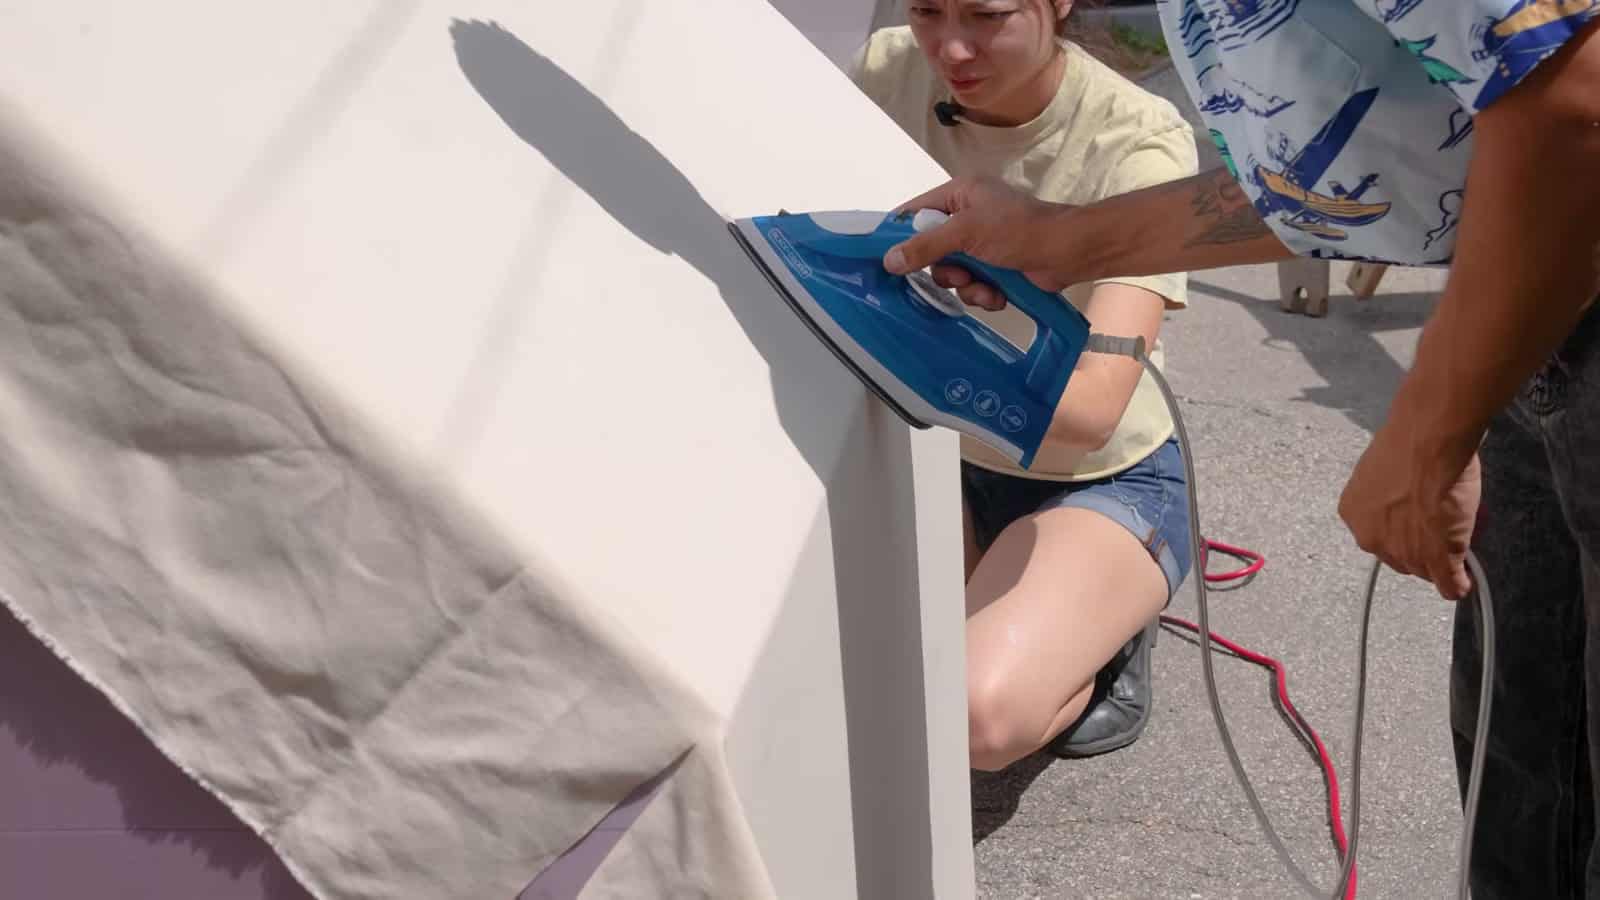
One more tip from experience: don’t do this in direct sun. The crew laid the outside canvas at high noon in Los Angeles, and the glue dried faster than they could get the fabric down.
Images via Xyla Foxlin/YouTube
Assembling the Shell
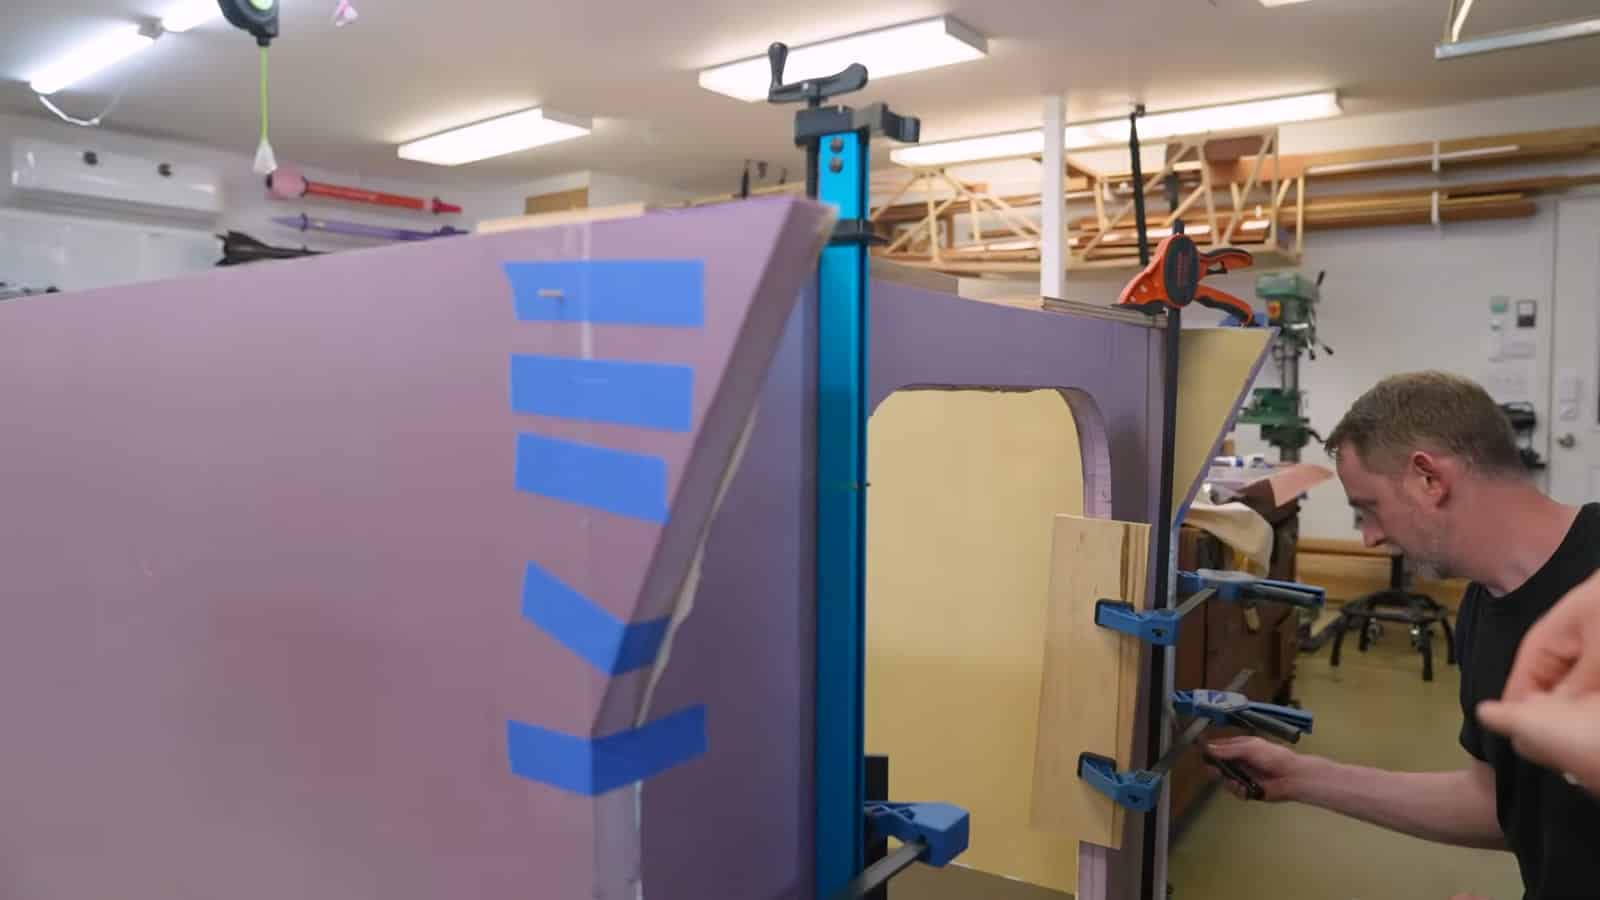
With the inside faces done, the panels went together with PL 300 and every clamp in the shop. Xyla points out that the clamps aren’t really part of the $1,000. With more time, you could get by with far fewer and simply let the glue cure longer. She thinks two weekends is the ideal pace, with a full week of curing between assembly and the exterior work.
Before the shell went onto the trailer, the crew countersunk the base where the trailer’s bolt heads poke up so the plywood would sit flat. That’s an easy thing to forget until the camper is already built on top of it.
Images via Xyla Foxlin/YouTube
Wrapping the Outside
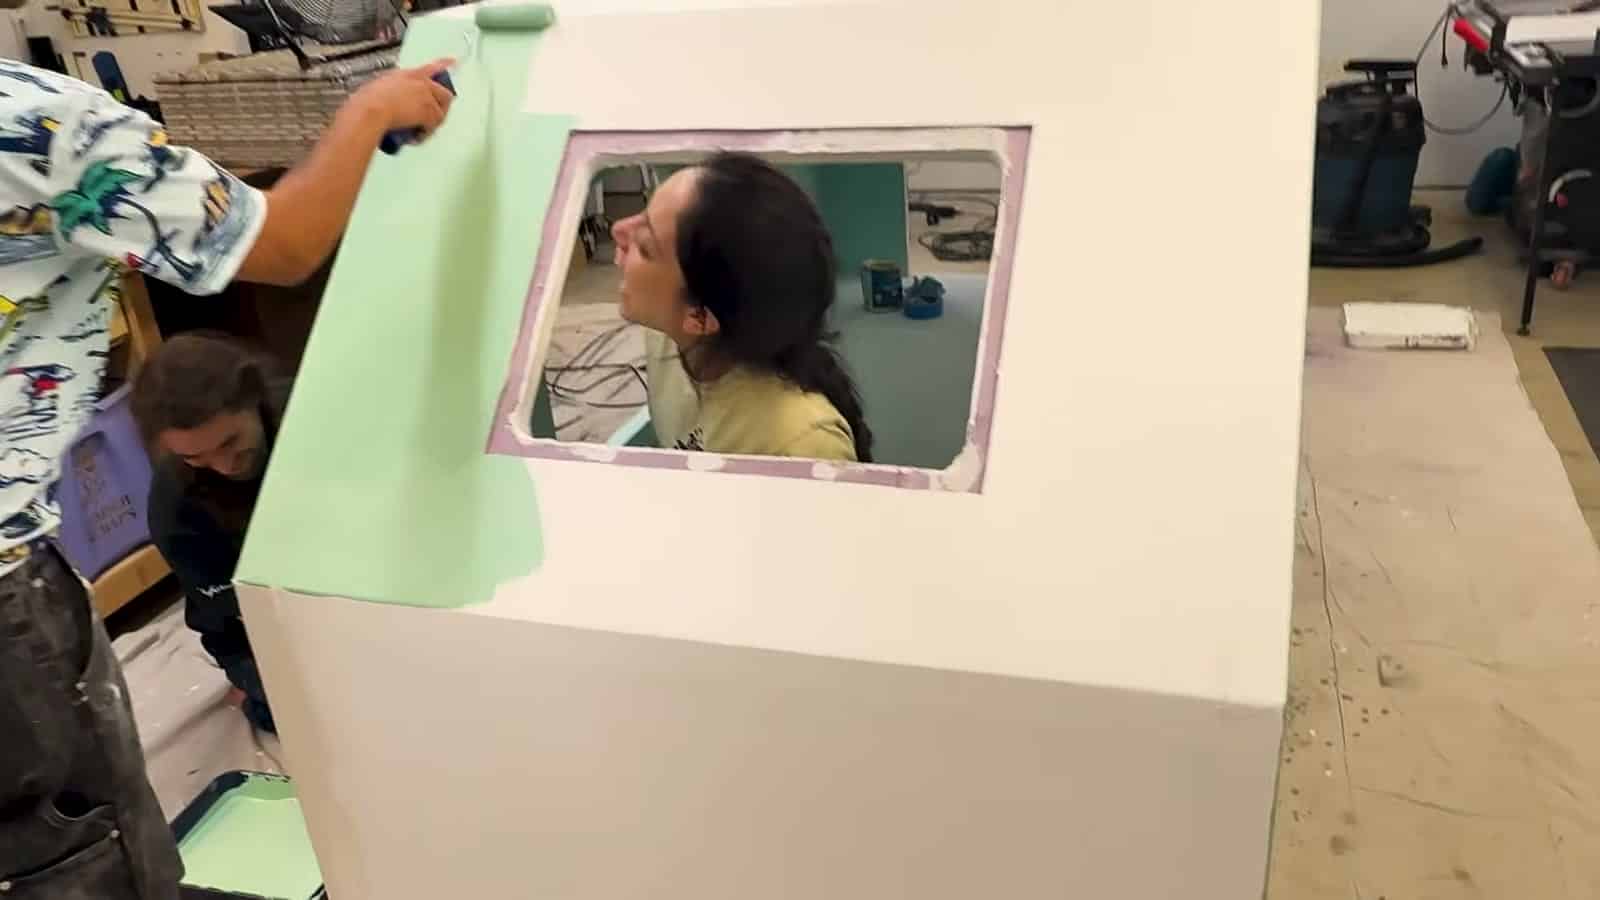
On day two, Xyla filled the seams with spackle, sanded, and used a router to round over every outside edge. Years of fiberglass work taught her that canvas, like fiberglass cloth, won’t lie down over a hard 90-degree corner, so a soft radius lets the fabric sweep around without air gaps.
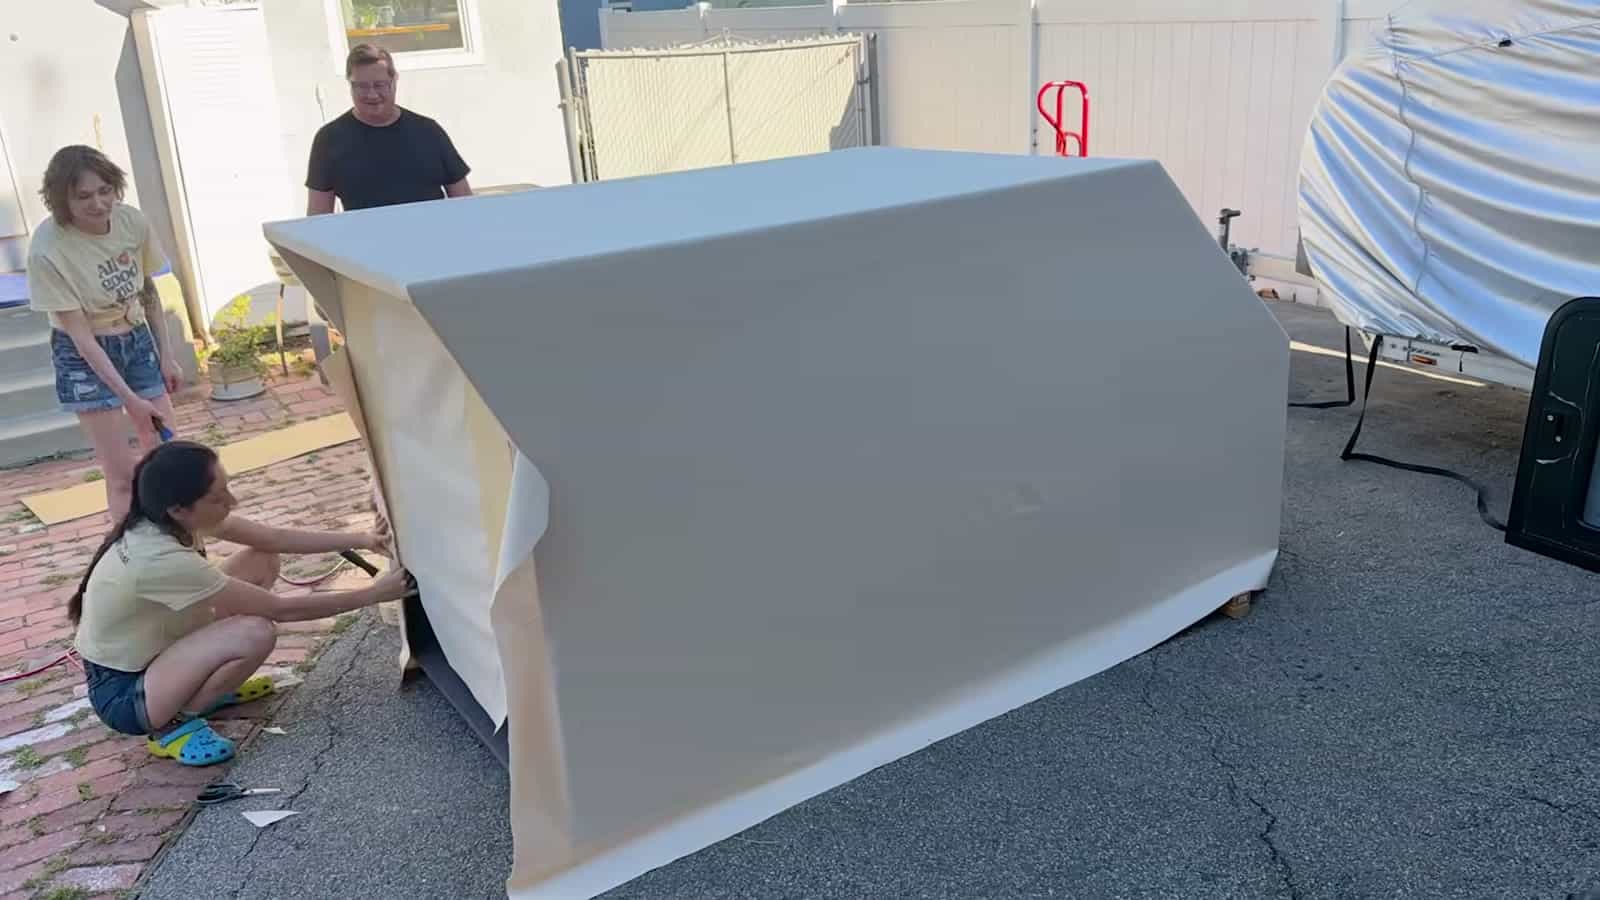
The outside canvas runs in one long piece from the front, over the roof, and down the back, with relief cuts so it folds neatly onto the sidewalls. The raw edges land on top, where they’re hard to see. For weatherproofing, she wrapped the canvas all the way under the plywood base so no edge faces the rain. She says the inside corners around the back fins were the most frustrating part of the whole build. Skip the fins if you’re nervous, though she thinks they’re worth it.
Images via Xyla Foxlin/YouTube
Images via Xyla Foxlin/YouTube
Buying the Windows and Door Instead of Building Them
The biggest lesson Xyla carried over from her first teardrop was to buy the doors and windows. The two 24×20-inch RV windows were $95.90 each, and the 26×32-inch RV door was $225.10 on eBay. That’s more than 40 percent of the budget on openings alone, but on a 48-hour clock, the time saved was worth it.
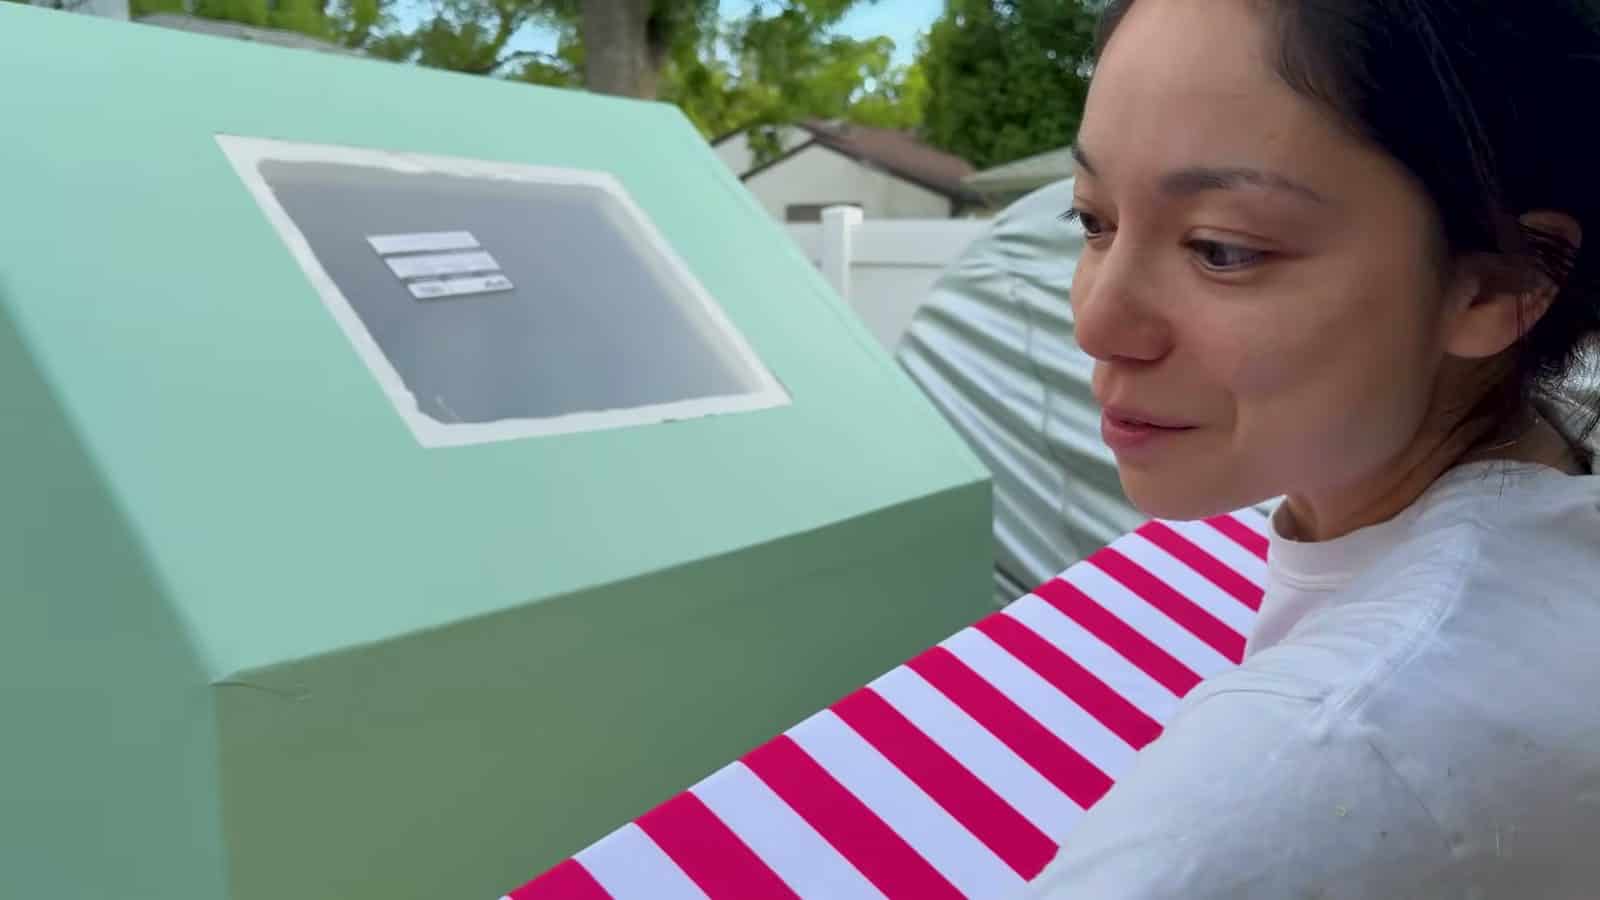
Because foam alone isn’t strong enough to hold a door frame, she glued scrap wood strips inside the opening, then screwed through the door flange into the wood to sandwich the foam. Her rule for every opening: there’s no such thing as too much caulk. The skylight is just a 1/4-inch acrylic sheet dropped flush into a thick bed of exterior caulk. It doesn’t open, but she argues no teardrop is complete without a view of the stars from bed.
The crew closed up the last opening at 3:20 a.m.
Images via Xyla Foxlin/YouTube
A Drawer That Became a Tongue Box
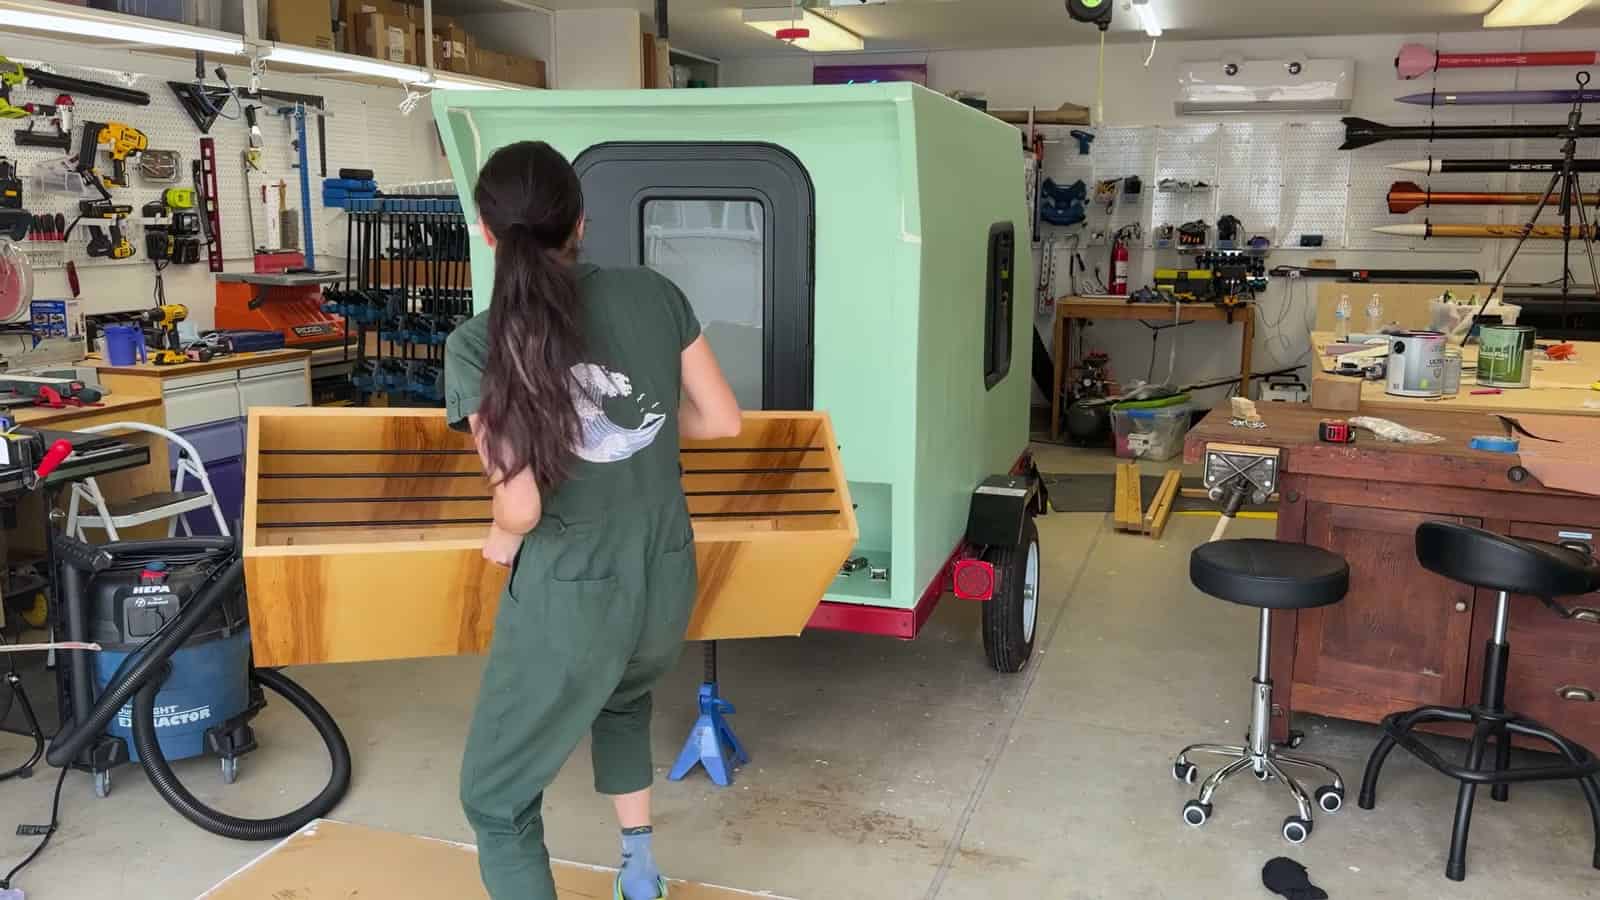
The plan called for a slide-out drawer under the rear of the camper that would double as a kitchen counter. Two problems surfaced on Monday morning. A mistake in the cut list made the drawer 1.5 inches too wide for its slides. And once the camper was on the trailer, it was obvious the Harbor Freight axle sits too far forward, leaving the whole rig back-heavy.
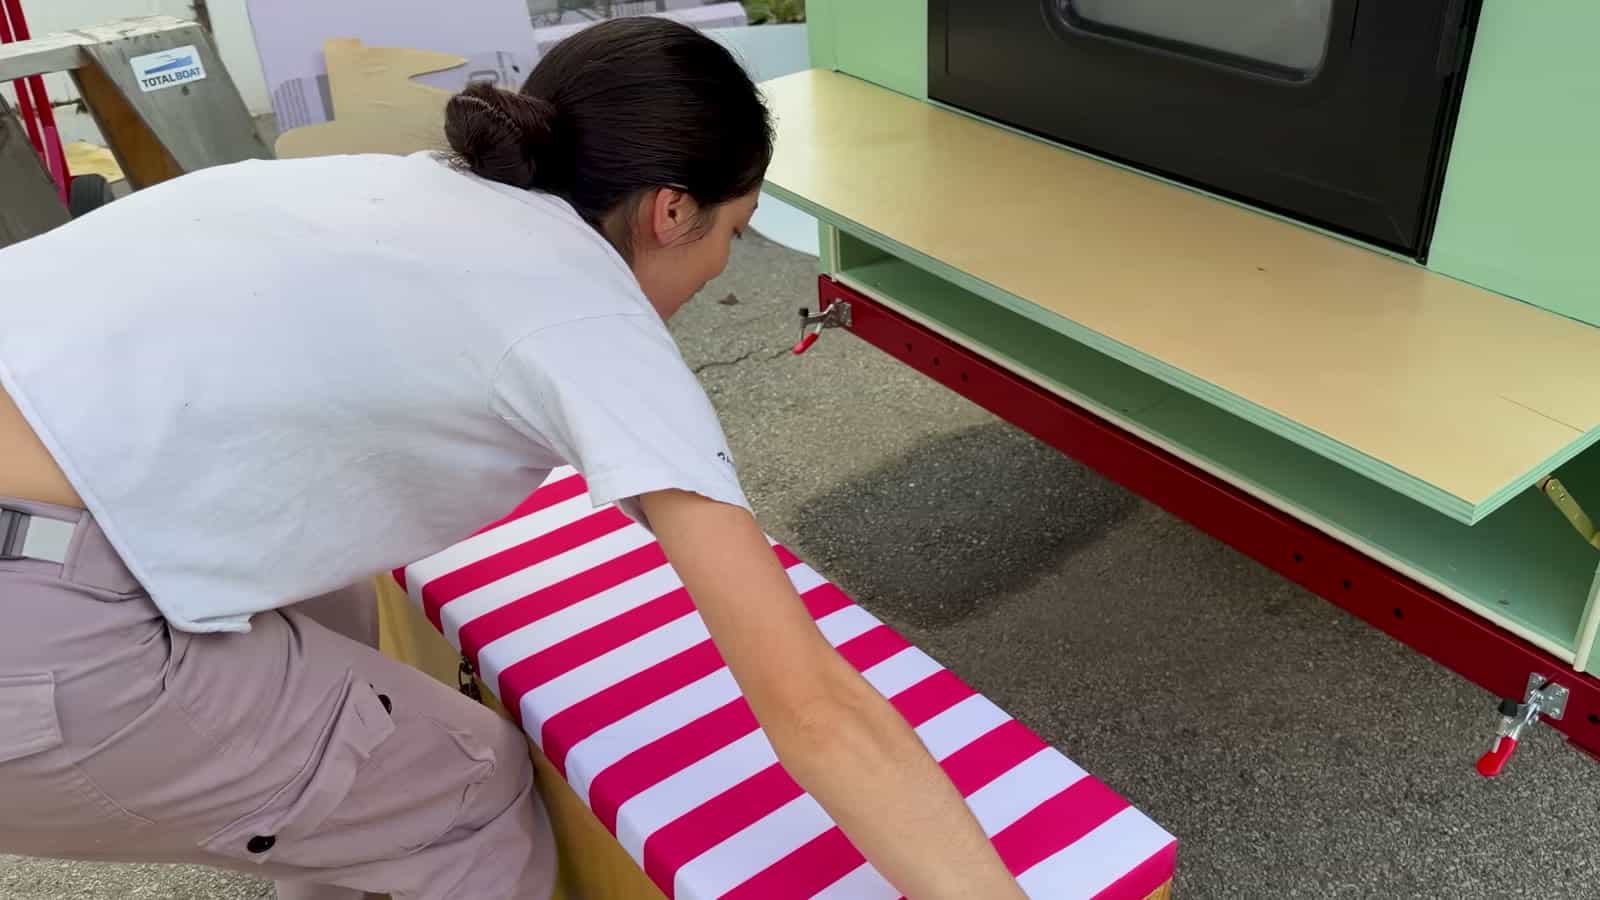
The fix solved both problems. The drawer box became a removable storage box that rides on the tongue, adding the tongue weight the trailer needed. A scrap panel on lid-support stays now folds down from the back as the camp counter. Xyla says the thing she uses most when camping is just a flat surface to set a stove on.
Images via Xyla Foxlin/YouTube
Images via Xyla Foxlin/YouTube
A Sliding Awning Made From Conduit
Xyla’s favorite part of the build is the awning, and it’s a clever design. A U-shaped frame of 1/2-inch EMT conduit slides inside lengths of 3/4-inch conduit mounted to the camper. To deploy it, you just pull the U-frame out. The canopy is waterproof striped canvas with sewn loops that slip over the conduit arms. She cut the scalloped edge on her laser cutter for a 1950s look, though scissors would work fine.
Using leftover packing foam from her shed and the same striped fabric, she also upholstered the tongue box lid. It’s the right height to serve as a bench for the fold-down counter, and it matches the awning.
Images via Xyla Foxlin/YouTube
Images via Xyla Foxlin/YouTube
Images via Xyla Foxlin/YouTube
What She’d Change Next Time
Xyla included a frank list of revisions for anyone copying the design:
- Move the door to a sidewall, forward of the wheels. Getting in through the back is awkward. A side door also lets you drop one window and save money.
- Find a different trailer if you can. The Harbor Freight axle sits too far forward for this layout.
- Add cabinets in the front two feet of the interior. Her first design had plywood cabinets there for clothes and gear. She cut them to stay under $1,000, but says an extra $100 of plywood is absolutely worth it, and it adds useful tongue weight.
Design Details
- Builder: Xyla Foxlin and friends, Los Angeles, California
- Type: DIY “foamie” teardrop camper
- Trailer: 4×8 Harbor Freight utility trailer (about $800, not included in the budget)
- Shell: 1.5-inch XPS foam board glued with Loctite PL 300 foamboard adhesive
- Skin: Poor man’s fiberglass (7 oz cotton duck canvas and Titebond II), primer, exterior paint
- Base: 23/32-inch sheathing plywood with exterior paint on the road side
- Openings: Two 24×20-inch RV windows, one 26×32-inch RV door, fixed 18×24-inch acrylic skylight
- Exterior: Removable tongue storage box with upholstered seat, fold-down camp counter, sliding conduit awning
- Materials cost: $1,000.21
- Build time: One long weekend for the camper; the awning and seat were added a few days later
Where the $1,000 Went
Xyla published her full bill of materials. Here are the main line items:
- RV door: $225.10
- Two RV windows: $191.80
- Four sheets of 1.5-inch pink foam: $133.56
- Cotton duck canvas (25 yards): $124.75
- 3/4-inch plywood: $80.00
- Exterior paint: $46.98
- Acrylic skylight sheet: $36.68
- Sheathing plywood base: $35.80
- Conduit and elbows for the awning: $37.67
- Titebond II, PL 300 adhesive, caulk, striped canvas, toggle clamps, and lid stays: about $88
What Makes This Build Special
- It’s a real, replicable recipe. The PMF ratios, the adhesive that actually works on XPS, and the revision list mean the next builder can skip most of the mistakes.
- It spends money where it saves time. Buying the windows and door eats 40 percent of the budget but removes the slowest, fussiest part of a teardrop build.
- It solves problems on the fly. A drawer that didn’t fit became a tongue box that fixed the trailer’s weight balance.
- It proves you don’t need a fancy shop. Foam, canvas, glue, an iron, and a jigsaw do most of the work, and friends make it faster.
Xyla also offered the finished camper as a giveaway to her Patreon supporters and channel members. As she put it, if you can’t win one, just make your own.
Learn More
- Xyla Foxlin on YouTube
- Full bill of materials (Google Sheets)
- Xyla Foxlin on Instagram
- Xyla Foxlin on Patreon
Video: The Best DIY Camper Build

Images via Xyla Foxlin/YouTube
Highlights
- Foam-and-canvas teardrop built in one long weekend for $1,000.21 in materials
- 1.5-inch XPS foam shell with a poor man’s fiberglass skin
- Loctite PL 300 was the only adhesive tested that didn’t melt the foam
- Store-bought RV windows and door to save build time
- Flush acrylic skylight for stargazing
- Removable tongue box that doubles as a seat and adds tongue weight
- Sliding awning made from two sizes of electrical conduit, about $38 in parts
Related Stories
- He Spent 26 Days and $3k Building His Teardrop Camper
- This DIY E-Bike Camper Has Solar, Starlink and a TV
- This Copper-Clad Steampunk Teardrop Trailer Takes Tiny Travel to Another Level
- High Camp Teardrop: A Portland-Built Aluminum Camper with a Slide-Out Kitchen
Disclosure: This post may contain affiliate links. If you purchase through one of our links, we may earn a commission at no additional cost to you.


Alex
Latest posts by Alex (see all)
- Freedom Camper: A 195-Pound Insulated Shell That Turns Your Truck or Utility Trailer Into a Camper - October 23, 2026
- She and Her Friends Built This Foam Teardrop Camper in One Weekend for $1,000 - October 23, 2026
- Timberleaf Classic: A Handcrafted Colorado Teardrop With a Big Skylight and Full Galley - October 23, 2026