
Disclosure: This post may contain affiliate links. If you purchase through one of our links, we may earn a commission at no additional cost to you.
The Going Tiny Series, Part 24 of 45 · Guide 3 of 5: Tiny Without the Ladder
A free chapter goes up every day. See every part. Rather have it all at once, with printable worksheets? Get the Going Tiny Toolkit.
Several readers mentioned the same worry, sometimes with a laugh: “How the heck would I get out that tiny window in an emergency?” It’s a fair question, and it deserves a real answer.
“I’ve often looked at the lofts on your site and wondered how the heck I would get out the window in an emergency. Not that my butt wouldn’t fit; more that I’m not as agile as I used to be!”
— Catherine, Tiny House Talk reader
Two ways out
The best safety feature in a small home is a second way out. In a house with only one door, a fire in the kitchen near that door can block your only exit. If you can, have two exterior doors, ideally at opposite ends of the house. If anyone uses a wheelchair, both exits should be usable from a wheelchair, which may mean two ramps or a ramp and a lift. If a second accessible door truly isn’t possible, talk with your local fire department about a plan.
A real home from Tiny House Talk
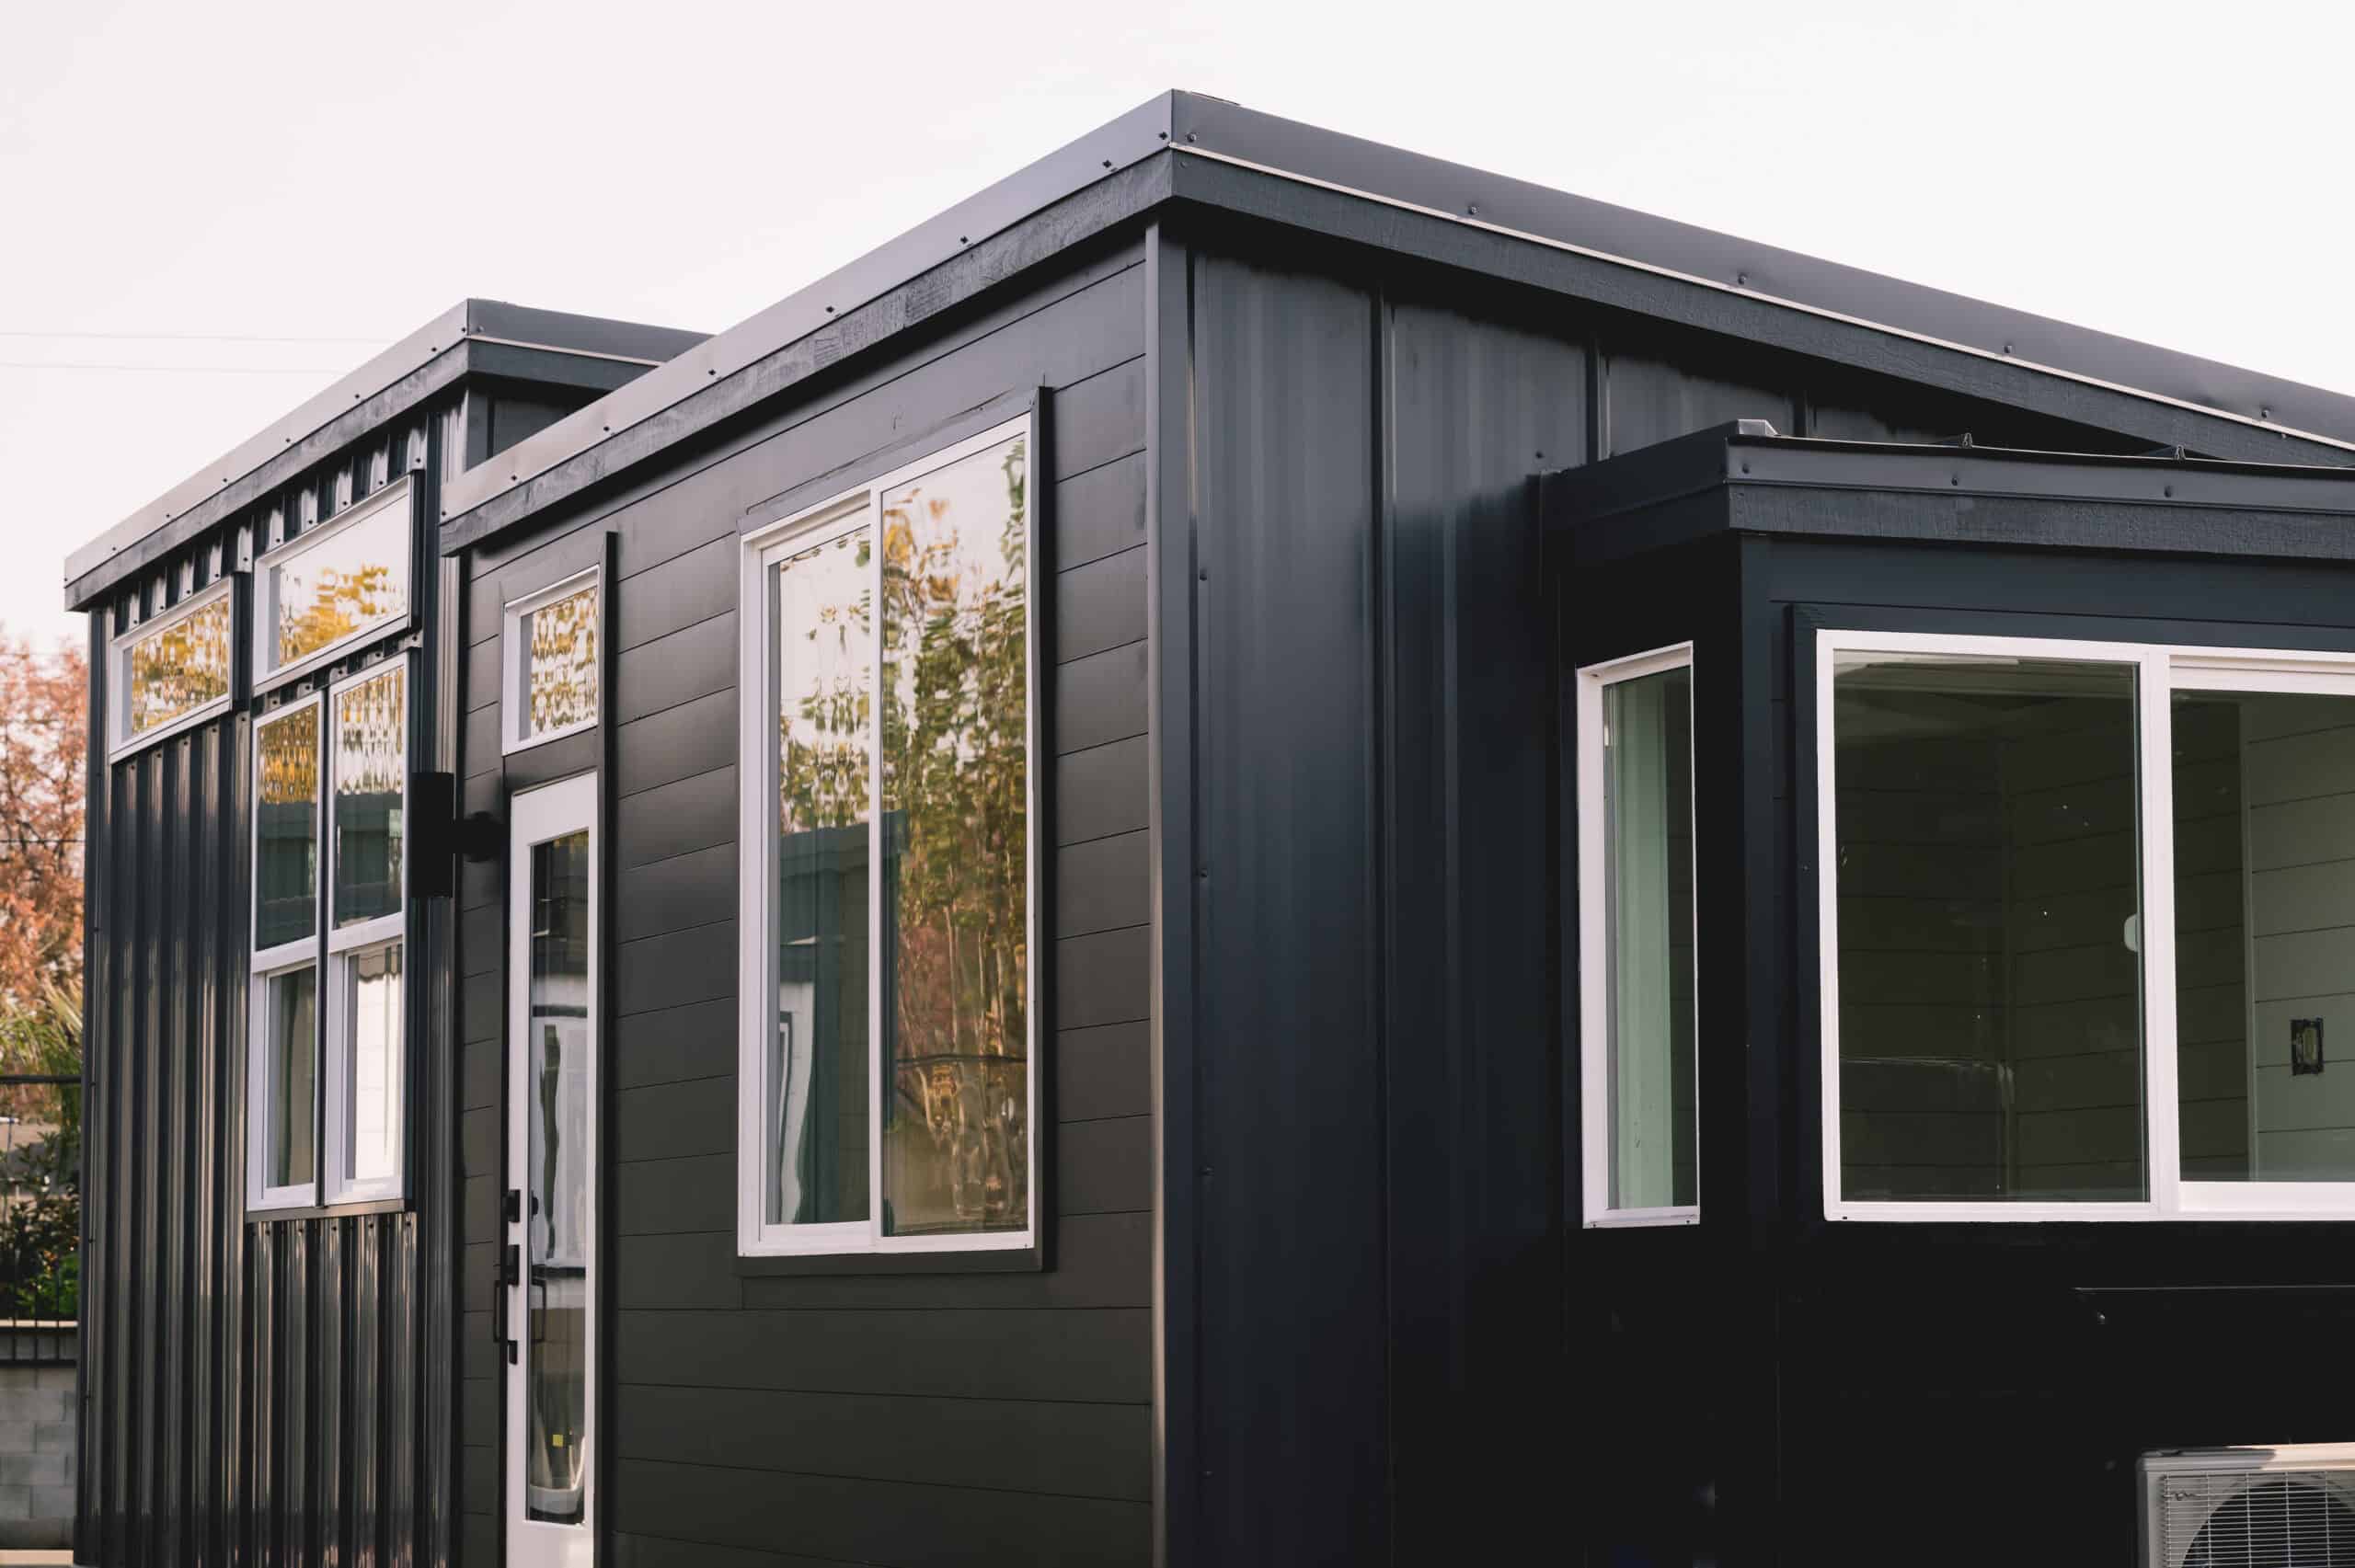
Photo courtesy of California Tiny House
A single-level tiny house designed with two entrances
California Tiny House says two entrances were one of the features its custom clients asked for most, so its Vesta 32 has them. The 10-foot-wide, single-level home packs 320 square feet with no loft, and it's meant to work as an ADU, a guest suite, or a home of its own.
Emergency escape windows (egress)
Building codes require a sleeping room to have an “emergency escape and rescue opening,” usually a window large enough for a person to climb out and a firefighter in full gear to climb in. In the IRC, the common reference is:
| Item | IRC reference (Section R310; verify locally) |
|---|---|
| Net clear opening | At least 5.7 square feet (5 square feet for a window at ground level) |
| Minimum clear height | 24 inches |
| Minimum clear width | 20 inches |
| Sill height | No more than 44 inches above the floor |
Notice that 20 inches wide by 24 inches high only gives about 3.3 square feet. To reach 5.7, a window has to be bigger in at least one direction. Appendix AQ has separate provisions for egress from lofts, which can include roof windows or skylights designed for escape. Ask your building department which rules apply to you.
An egress window is not an exit for everyone
For someone who uses a wheelchair, or who can’t climb, a window is a way for rescuers to get in, not a way for you to get out. Plan your real escape route through a door. Put your bedroom near an exit. Keep the path from bed to door clear at all times. And sleep with your phone, glasses, and a flashlight within reach.
Want to do this on paper?
The printable PDF of Tiny Without the Ladder has fill-in worksheets for this step, including:
- Mobility & Daily-Routine Needs Assessment
- Space Must-Haves vs. Nice-to-Haves
- Bathroom & Kitchen Accessibility Checklist
They come with all five guides in the Going Tiny Toolkit.
Smoke and carbon monoxide alarms
- Put a smoke alarm in or near every sleeping area and on every level, including a loft.
- If you have any fuel-burning appliance (propane, natural gas, wood stove, oil) or an attached space where a car might run, put in carbon monoxide alarms near the sleeping areas.
- Interconnected alarms (where one sets off all of them) are a big help in a house where you might not hear an alarm from the far end.
- In a tiny space, a smoke alarm too close to the kitchen will go off every time you cook, and people end up pulling the batteries out. Ask about alarms designed to reduce cooking nuisance alarms, and place them carefully.
- Test monthly. If you can’t reach the ceiling safely, choose alarms with a long-life sealed battery, ask a family member, or ask your local fire department. Many fire departments help seniors test and install alarms.
Propane and fuel safety
- Keep propane tanks outside the living space, upright, and secured.
- Install a propane leak detector. Propane is heavier than air and collects low, so detectors usually go near the floor; follow the manufacturer’s instructions.
- Know where the shutoff valve is and make sure you can reach and turn it.
- If anyone in the home uses medical oxygen, keep it well away from open flames, gas burners, and wood stoves, and talk with your oxygen supplier about safe placement. This is one more reason some people choose an all-electric, induction kitchen.
Preventing falls
Falls are a leading cause of injury for older adults. Most fall-prevention steps are cheap and simple:
- No throw rugs, or rugs with non-slip backing and low edges
- Grab bars (with blocking behind them) in the bathroom
- Motion-sensor night lights from bed to bathroom
- Handrails on both sides of any steps, inside and out
- No single steps inside the house
- Cords and pet bowls kept out of walking paths
- A chair or bench near the door to sit and put on shoes
- Non-slip surfaces in the shower and on the ramp
- Everyday items stored between hip and shoulder height, so no step stools
Medical alert and staying connected
If you live alone, or if someone in your home could fall and not be able to get up, consider a medical alert system: a wearable button or a watch with fall detection that can call for help. Some work only at home; some work anywhere there’s cell service. Check that the device works where your home is, especially in rural areas with weak signal. Also tell a neighbor or nearby friend about your routine, and consider a daily check-in by text.
Let the right people know
Many electric utilities have a program for customers who rely on powered medical equipment, so they can be notified about planned outages. Many local emergency services let you register a disability or medical need. Call or check the website of your utility and your county emergency management office to ask. If phone calls are hard for you, ask whether they accept email or an online form.
Power outages and medical equipment
If you depend on powered equipment (oxygen concentrator, a power wheelchair, a lift bed, a CPAP, a home dialysis machine, refrigerated medication), plan for outages. Options include a battery backup system, a generator with a safe outdoor location, or a plan to go somewhere else. Ask your equipment supplier how long the battery lasts and what they recommend.
Living near care
This one gets overlooked by people dreaming about land in the woods. If you need dialysis three times a week, regular doctor visits, physical therapy, or a home health aide, distance becomes part of your health plan.
“As someone who is nearing retirement age, I am seeing the prospect of many approaching problems. In order of importance: stairs, proximity to good medical care, available public transport, proximity to social activities…”
— Catherine, Tiny House Talk reader
- Map the drive time to your nearest hospital, your doctors, your pharmacy, and (if needed) your dialysis center or treatment center.
- Ask home health agencies whether they serve the address you’re considering. Some don’t go to rural areas.
- Check whether ambulances can reach the home easily, including in winter.
- If you may stop driving someday, check for public transit, paratransit, or volunteer driver programs nearby.
Finding a legal place to put a small home near the care you need is its own puzzle. Where Can I Put It? walks through how to research zoning and find spots, including tiny house communities, RV and park model communities, and backyard ADUs near family.
Your turn
Loft or no loft? Tell me what your knees (or your heart) say in the comments.
Prefer the clean, printable version?
This series is free to read here, and it always will be. If you’d rather have it as five clean, printable PDFs, that’s the Going Tiny Toolkit:
- Tiny Without the Ladder (the guide this chapter comes from): one-level layouts, real accessibility dimensions, and the bonus One-Level Floor Plan Idea Book
- The Tiny House Money Plan
- Where Can I Put It?
- Bringing Them On Board
- Your First Tiny Steps
Every guide adds printable worksheets and a 30-day action plan, and Tiny Without the Ladder comes with the bonus One-Level Floor Plan Idea Book (18 to-scale floor plans). All five are $47, with a 30-day refund.
← Previous: Part 23: The Accessibility Dimensions That Matter in a Small Home
Next (tomorrow): Part 25: Designing for You Now and You in 15 Years
Not sure which part matters most for you? The free 10-minute What’s Really Holding You Back? quiz tells you where to start. And to get a new part (and a new home) in your inbox each day, join the free Tiny House Newsletter.
Disclosure: This post may contain affiliate links. If you purchase through one of our links, we may earn a commission at no additional cost to you.


Alex
Latest posts by Alex (see all)
- Tiny House Safety: Egress, Alarms, Falls, and Care Nearby - November 11, 2026
- A One-of-a-Kind Two-Bedroom Escape Home at Canoe Bay Village (Lot 30) - November 10, 2026
- Family Sprinter Camper Van with Swivel Dinette, Queen Bed, and Seating for Four - November 10, 2026
















Join the Conversation
No comments yet. Be the first to join the conversation.