Today, we’re super excited to let you read Allison & James’ super-detailed story — there’s no need for my commentary! Grab yourself a cup of coffee, and I’ll let Allison take it from here…
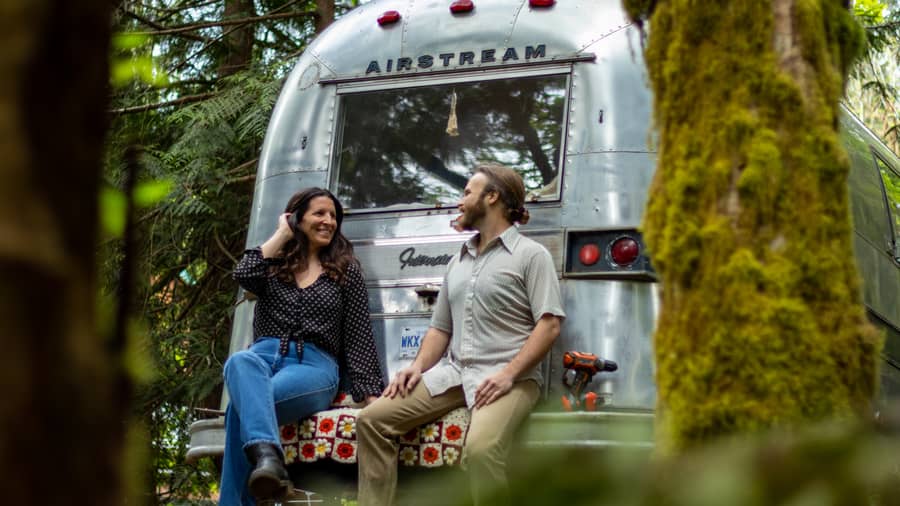
We are a couple from opposite sides of the world (Newfoundland and Australia) building a life together in a teeny-tiny 160 square feet.
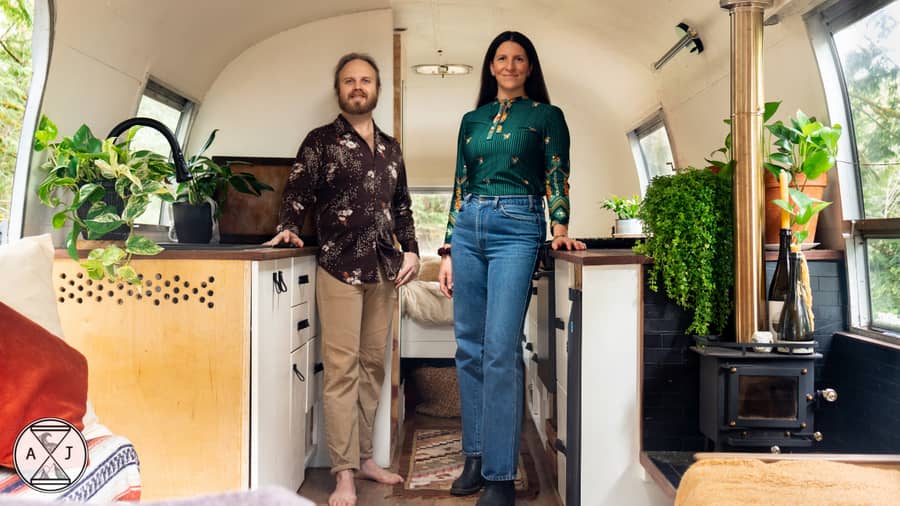
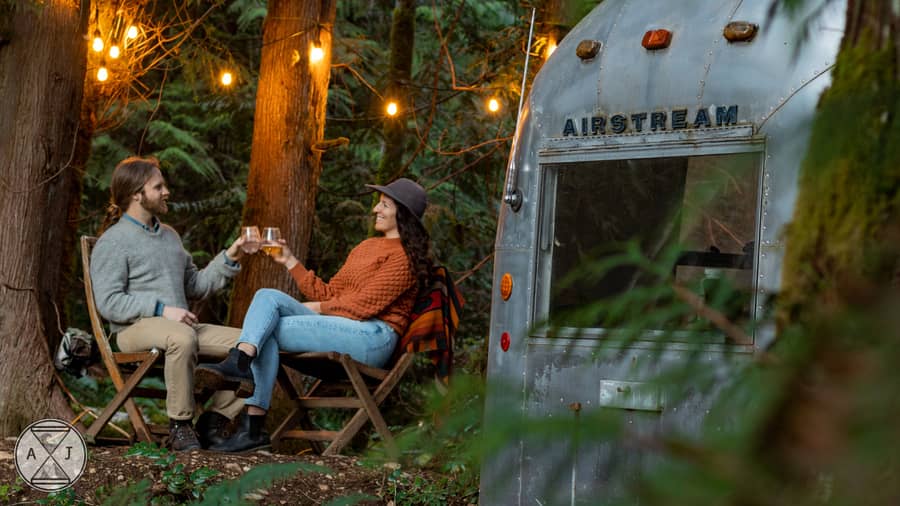
Our current tiny home is a vintage 1968 Airstream Overlander nestled in the woods here in the Canadian Pacific Northwest! We’ve been living in and restoring our tiny home on wheels for the past 15 months.
We purchased the Airstream for $8,000 knowing that it would need a complete overhaul. And we converted it into our dream modern tiny home with our own two hands, in just 60 days, without prior building experience. It’s been a huge project!!
Don’t miss other interesting tiny homes like this one – join our FREE Tiny House Newsletter
They Did All This in Just 90 Days!
Images via @allisionmcissac
When we took possession the interior was original but it was dumpy, dirty and full of mold. Years and layers of paint was just falling off, it was leaking and there were areas of completely rotten subfloor. The utility systems were pretty well non functional; the propane was disconnected, the plumbing would need to be replaced, the electrical would also need to be entirely replaced since the original wires were made from aluminum (which isn’t up to modern day code). (Here’s footage of what the airstream looked like before)
Lots of work had to be done to get the Airstream back into a livable condition.
Despite being 50+ years old, the body and chasey was in good condition but it needed to be patched with aluminum in a few places and last but not least it needed new tires!
Images via @allisionmcissac
When we began demolishing it we found some pretty interesting things – we uncovered 50 years of dirt and grime behind the cabinetry and found more areas of rotten subfloor. We found dead rodents and exotic pests! There were even mushrooms growing in the walls!
They started restoring the 50-year-old trailer.
But we’re big dreamers and we had a pretty romantic vision for what this caravan could become! So we worked tirelessly for 3 months, working 12-16 hours days to make our tiny home on wheels move-in-ready.

Images via @allisionmcissac
One of the most painstaking parts of the process was stripping the interior walls back to the original panels (or skins) to remove a vinyl plastic coating so that new paint would adhere. This resulted in a grueling 3 day sanding marathon! To solve the subfloor issues we reinforced it with the laminated plywood.
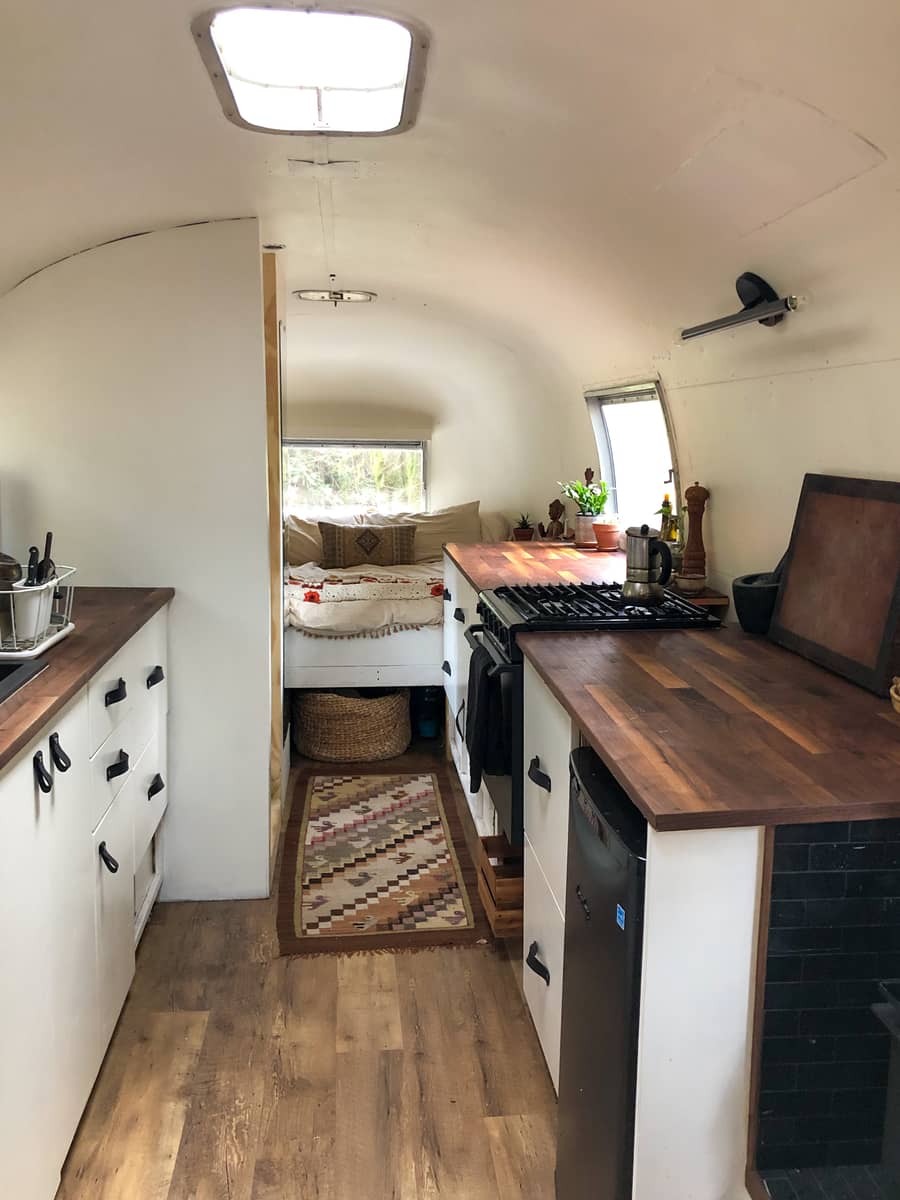
They actually spent 3 days sanding it! But here is what the bedroom looks like today.

Images via @allisionmcissac
Building the walls was also an interesting challenge – especially for us novice carpenters,
in a curved space that wasn’t on level ground. This is when we learned about the patience proving process of ‘scribing’.An added challenge was that we were also completing the build during winter here in Canada, without a workshop, which meant long hours spent outside in the cold sanding and milling wood.
Images via @allisionmcissac
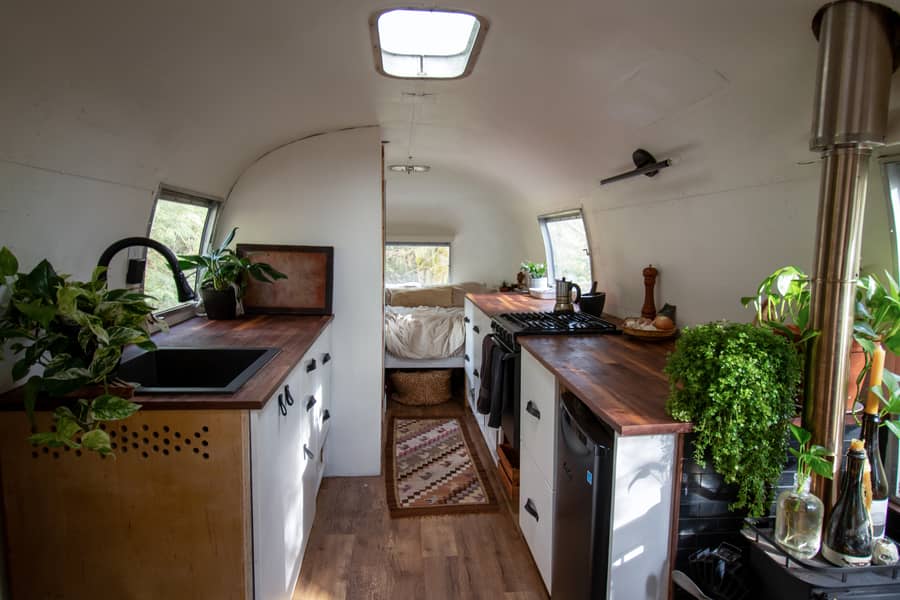
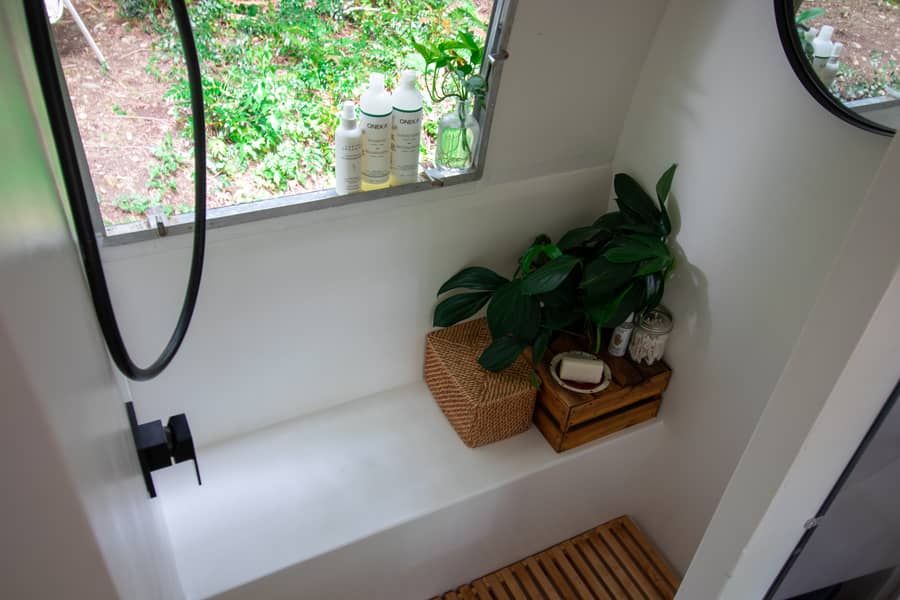
We custom built every component from scratch including the cabinetry and countertops. Our cabinetry was built using 3/4inch plywood and we hand-crafted 15 ft of beautiful wood countertops from single slab of walnut.We also learned how to work with fiberglass to design and build a custom modern wet-bath with indoor/outdoor shower and a composting toilet.
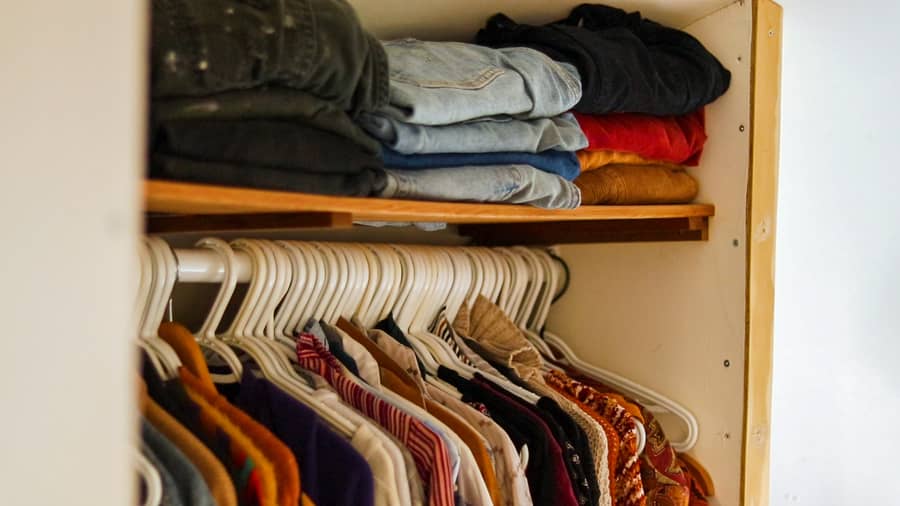
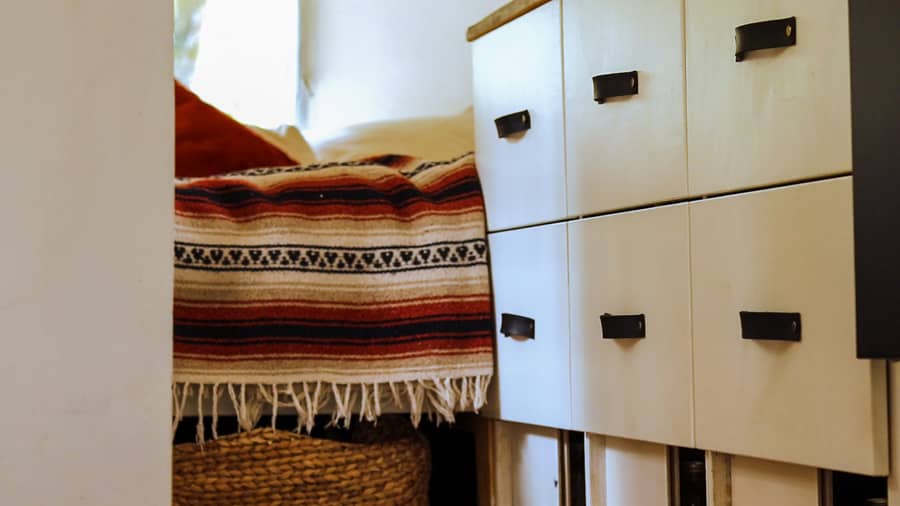
Their closet/wardrobe in the Airstream
Images via @allisionmcissac
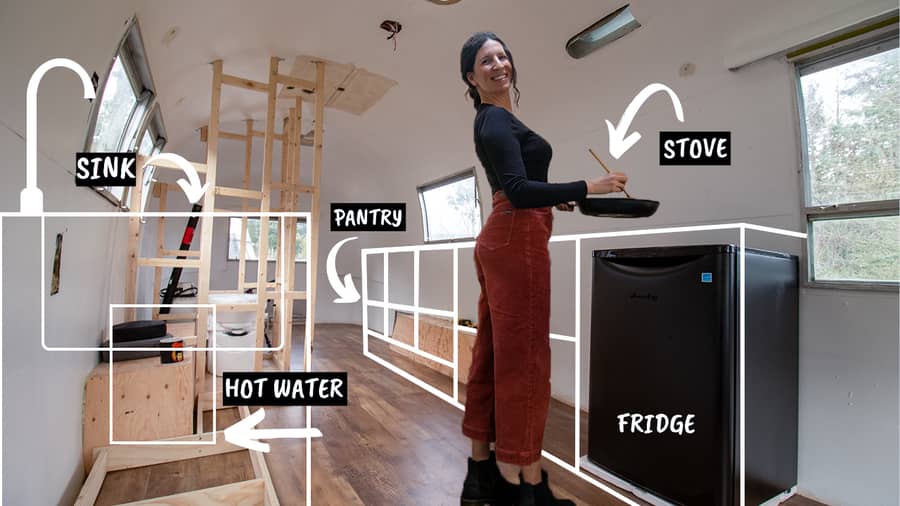
The most intimidating project on our tiny home to do list? Installing the utility systems that would bring us power, water and propane.
Having never installed electrical and propane, it was a huge learning curve with countless hours spent researching to ensure we were doing it correctly. It was a little nerve wracking testing the systems for the first time.
Images via @allisionmcissac
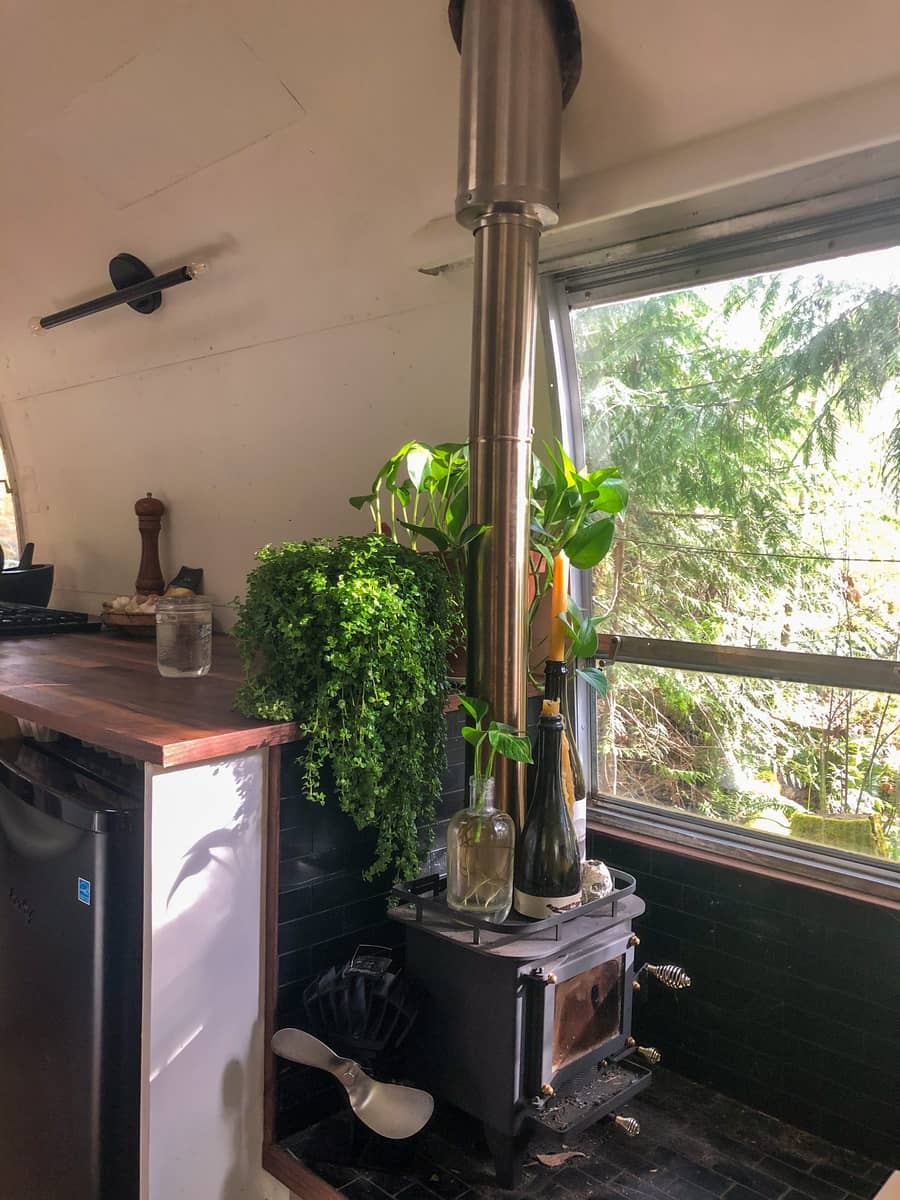
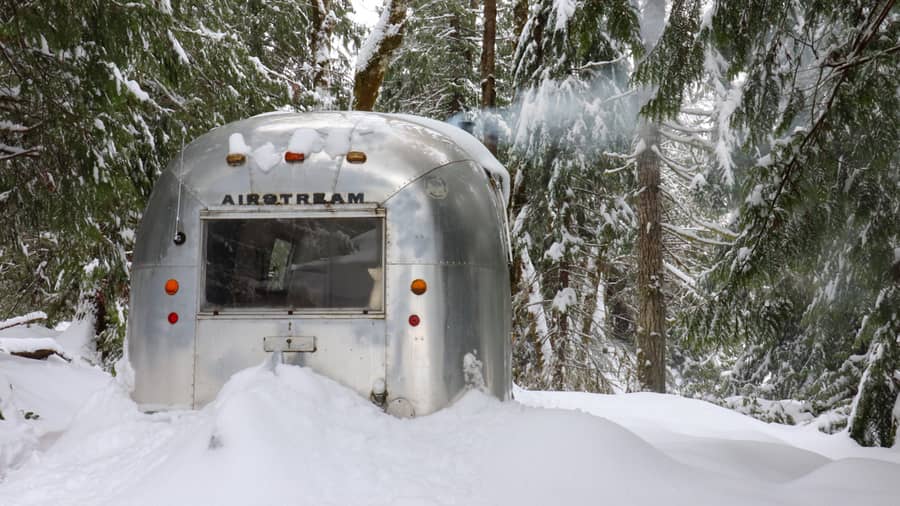
But we’re grateful we figured it all out! Now we get to enjoy modern day luxuries of hot water (on-demand propane system), a fully functioning 110 and 12volt electrical system, a propane stove and cook top, electric heating as well as a cubic mini woodstove which we installed ourselves in time for winter.

Images via @allisionmcissac
A lot of things were going on in the background of the build with both of us working in healthcare amidst the ever changing stressful circumstances of the pandemic. We experienced issues and delays acquiring supplies for the build, vehicle breakdowns, snow storms, and the anxiety of keep our new sailboat afloat.
Images via @allisionmcissac
Although overwhelming at times, doing and making everything ourselves really created a sense of pride. There’s something so satisfying about living in a home that you have built with our own two hands.
Images via @allisionmcissac
We initially bought the Airstream as a solution to the ongoing housing crisis in BC. Currently our tiny home on wheels is nestled in the forest on a beautiful property here on Vancouver Island.
Images via @allisionmcissac
We are currently on-grid and hooked up to residential power and water. Our monthly rent is a fraction of the cost of the current rental market – we pay $400/month utilities included when the average for a bachelor/1 bedroom apartment is $2000 on average. The entire build (including the price of the Airstream) has cost us about $25,000 to date.
Images via @allisionmcissac
We also have significantly reduced our environmental impact in building a home that requires much less materials than conventional and has minimal electrical and heating requirements.
Because our home is so tiny we can’t fill it with material possessions, which also lessens our consumeristic tendencies for buying things we don’t need.

Images via @allisionmcissac
Our decision to transition to tiny home living has paid off in a big way. We have been able to remain debt free (a goal of ours) and the financial freedom we have gained living this way vs has allowed us to scale back our working hours in our ‘9-5’ jobs and delve into more creative pursuits including starting our own business.
Images via @allisionmcissac
This lifestyle isn’t for everyone, living tiny certainly comes with its challenges! But downsizing our material possessions (living more minimally) and scaling back our works hours has created space to live more creativity & intentionally. We are able to spend more time doing things we love, learn new skills and hobbies and live and adventurous lifestyle outdoors.
Images via @allisionmcissac
We documented the entire process of our tiny home build in a series on YouTube. On our channel we post weekly videos that share our experiences living alternatively (we also live part time on our sailboat!) and our outdoor adventures.
VIDEO: Couple Convert Vintage Airstream
Highlights
- Allison and James transformed a vintage 1968 Airstream into a 160-square-foot tiny home over 60 days, despite having no prior building experience.
- The couple tackled significant challenges, including mold, rotten subfloors, non-functional utilities, and pests.
- They custom-built features like cabinetry and countertops, learned to work with fiberglass, and installed utility systems themselves.
- The project was completed during the Canadian winter without a workshop, adding to the complexity and effort involved.
- Living in the tiny home has allowed them to reduce living costs significantly, paying just $400/month in rent compared to the average $2000 for a one-bedroom apartment.
- Their minimalist lifestyle has led to reduced consumerism, decreased environmental impact, and financial freedom, allowing them to explore creative pursuits.
- They document their tiny home journey and alternative living experiences on their YouTube channel, providing inspiration for others interested in downsizing.
Learn More:
-
Subscribe for a new video every Wednesday www.youtube.com/c/allisonjames
-
Binge watch our Airstream build from the beginning: https://www.youtube.com/watch?
v=JxWebYM5fbI&list= PLnZU0VokI3bdkYf_p- 4rbnp6cIAafQXAC -
Allison’s Instagram https://www.instagram.com/
allisonmcisaac -
James’ Instagram https://www.instagram.com/
james_stce
Related Stories:
- Revitalized Airstream on an Organic Farm
- Airstream to 800 Sq. Ft. 1953 Bungalow Life
- 1976 Vintage Airstream w/ Covered Pavilion
Our big thanks to Allison for sharing!
You can share this using the e-mail and social media re-share buttons below. Thanks!
If you enjoyed this you’ll LOVE our Free Daily Tiny House Newsletter with even more!
You can also join our Small House Newsletter!
Also, try our Tiny Houses For Sale Newsletter! Thank you!
More Like This: Tiny Houses | Airstream | DIY | Interviews | RV Living
See The Latest: Go Back Home to See Our Latest Tiny Houses
This post may contain affiliate links and/or sponsored content.
Natalie C. McKee
Latest posts by Natalie C. McKee (see all)
- Two Bed Two Bath 10×40 Tiny House - June 16, 2024
- Southern Heights Small House Village - June 16, 2024
- Little Italy Tiny House Community: Corcoran, CA - June 16, 2024
Absolutely lovely home and great job. I would probably never have the patience to do epoxy. I heartily applaud you. Beautiful job! One quick and simple suggestion. Attach a tiny 1″ x 1″ strip of wood along both the front and back edges of your closet shelf. Attach it just under to the edges. It will strengthen the board and help keep it from bowing under the weight. Thoroughly enjoyed your videos. Great job!
Thank you Marsha Cowan!! The epoxy was a big job but a skill we think will help us with our next big project – refitting our sailboat! Honestly I think anyone can do it, but beware sanding it makes a huge mess! Haha
Thanks for the helpful tip re our bowing closet shelf! 🙂