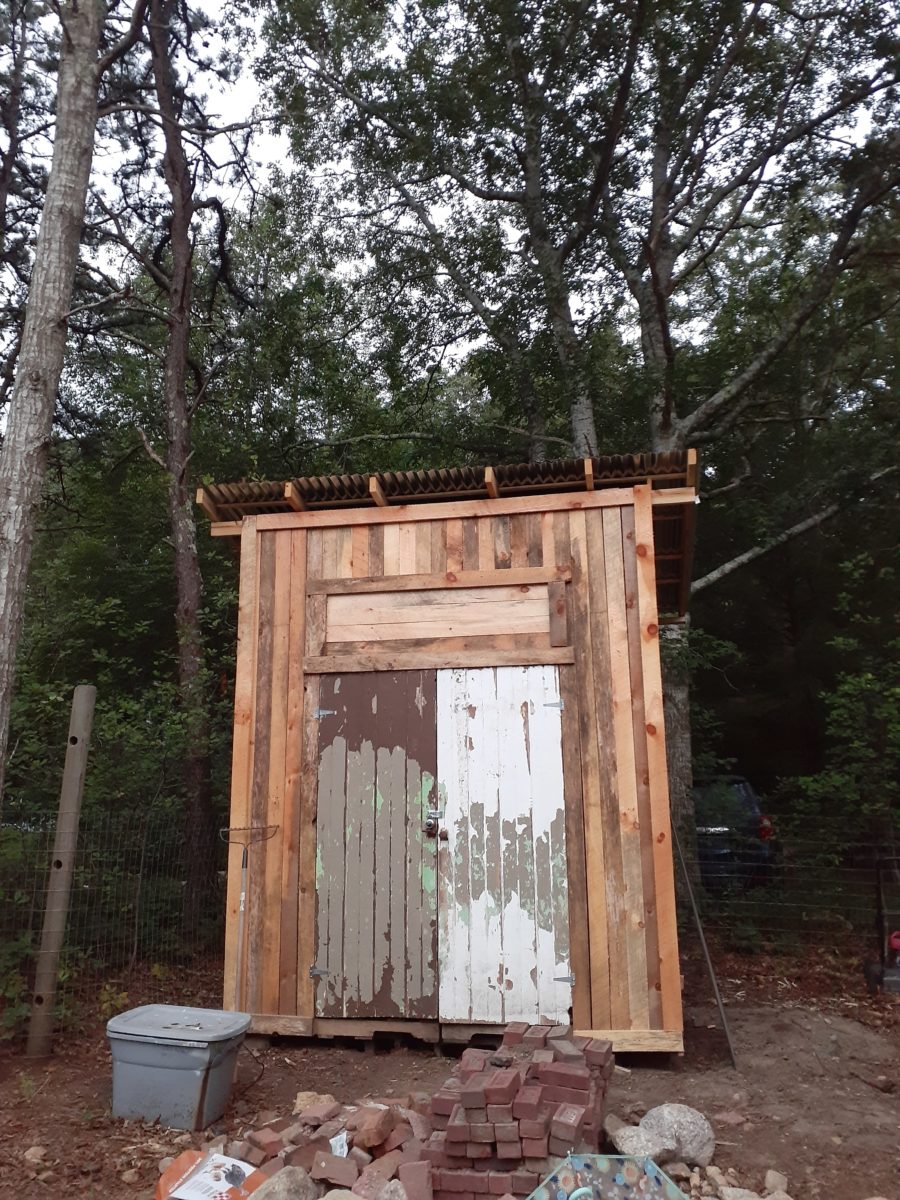
It’s Natalie here! I do a lot of the writing about tiny homes here, but today I want to show you what my husband and I have been working on — an 8×6 pallet shed using tons of reclaimed materials and rough cut lumber from a local sawmill.
We have three little kids and live in a *small* 1,100 square foot home on about an acre of land where we have goats, sheep, chickens, ducks, quail and a peacock. Homesteading is important to us, but we really wanted to get the animal feed and lawn/garden supplies out of our basement so they were easier to access and didn’t attract mice into our house.
It took us about a month with *many* interruptions from children, sickness, vacation and other projects, but we finally finished it — and for under $400 in materials (which with current lumber prices is a steal). While we are using it for storage, the basic idea could easily be transformed into a tiny living space for one.
Don’t miss other inspiring stories like this, join our FREE Tiny House Newsletter for more!
Simple Shed Project for Under $400
Images via Natalie C. McKee
The last step is to strip & paint these doors barn red!
Images via Natalie C. McKee
Our local sawmill still hasn’t raised their lumber prices, so all the siding is rough-cut pine we got for $1.40 per 1×4 board.

Images via Natalie C. McKee
It’s on a cinder block foundation (reclaimed from my father-in-laws old garden). The pallets we acquired from local businesses tossing them.

Images via Natalie C. McKee
Believe it or not, this was FREE plywood from a charity that needed to empty out its new building quickly. Facebook Marketplace has all kinds of deals.

Images via Natalie C. McKee
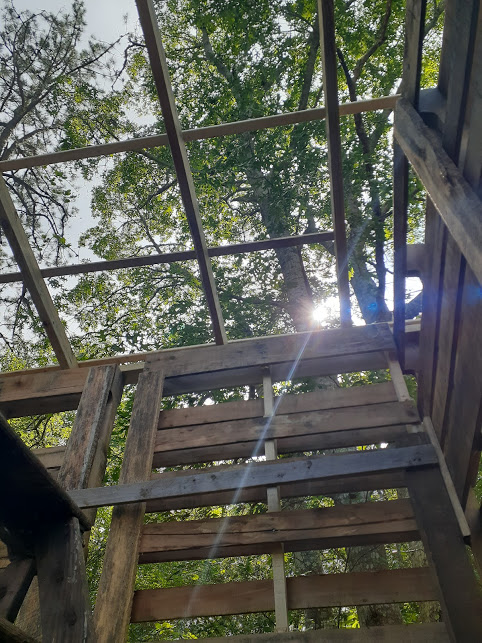
We did purchase furring strips and 2x4s for the roof that were new. Ultimately we had more money than time to wait for more reclaimed materials because we wanted this to be done by the end of the summer.
Images via Natalie C. McKee
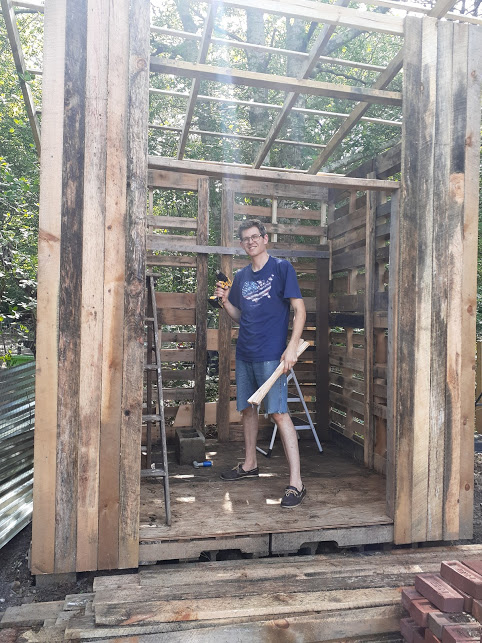
My amazing husband, who I couldn’t have done this without.
Images via Natalie C. McKee
Me, breaking all kinds of rules standing on the top step of an old ladder that we found in our basement when we moved in.
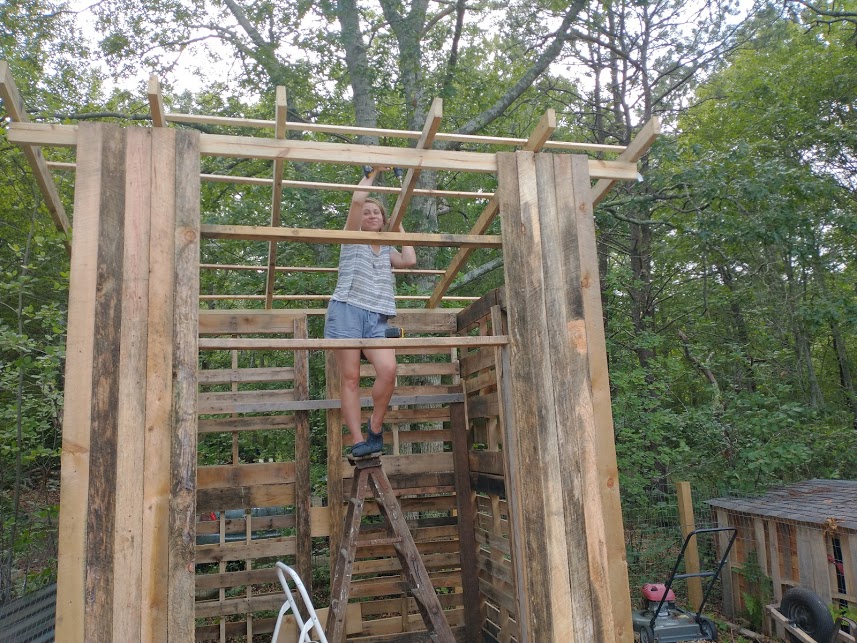
Images via Natalie C. McKee
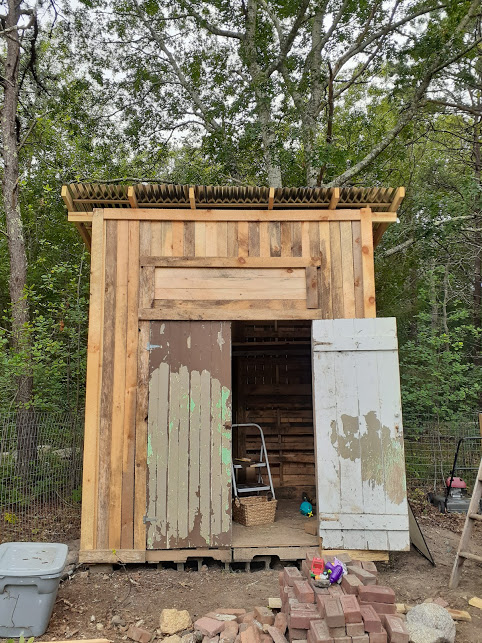
Ultimately we framed the front wall around the two reclaimed barn doors my parents had gifted us last year.

Images via Natalie C. McKee
The galvanized metal roofing was also purchased new because I couldn’t find any to reclaim. We also wanted a newer roof to keep water off our hay/feed.

Images via Natalie C. McKee
Absolutely nothing about this structure is square, but that’s the risk of working with pallets and rough-cut wood.

Images via Natalie C. McKee
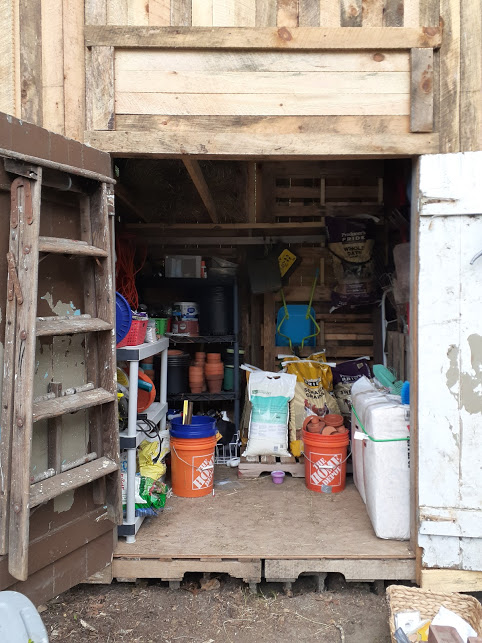
Here it is filled up with stuff! As you can tell, you could easily put a kitchenette on one side and a couch/futon on the other.
Images via Natalie C. McKee
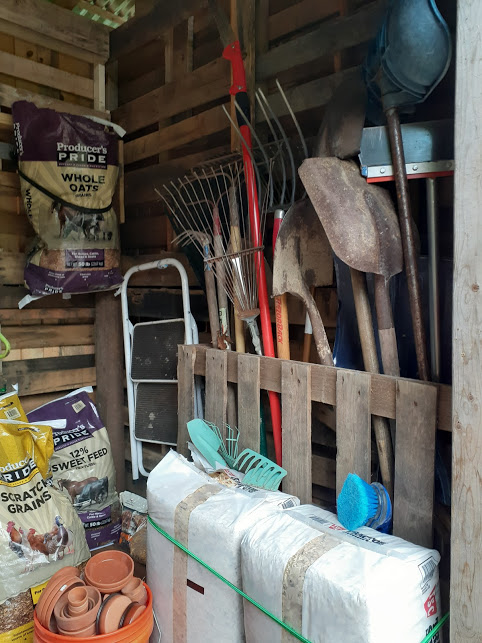
Pallets also make great tool racks.
Images via Natalie C. McKee
We left the walls un-insulated, and they’re great for hanging everything.

Images via Natalie C. McKee
We can fit about 10 bales of hay on the rafters here, and we plan on buying a couple more 2x4s to maximize the vertical space.

Images via Natalie C. McKee
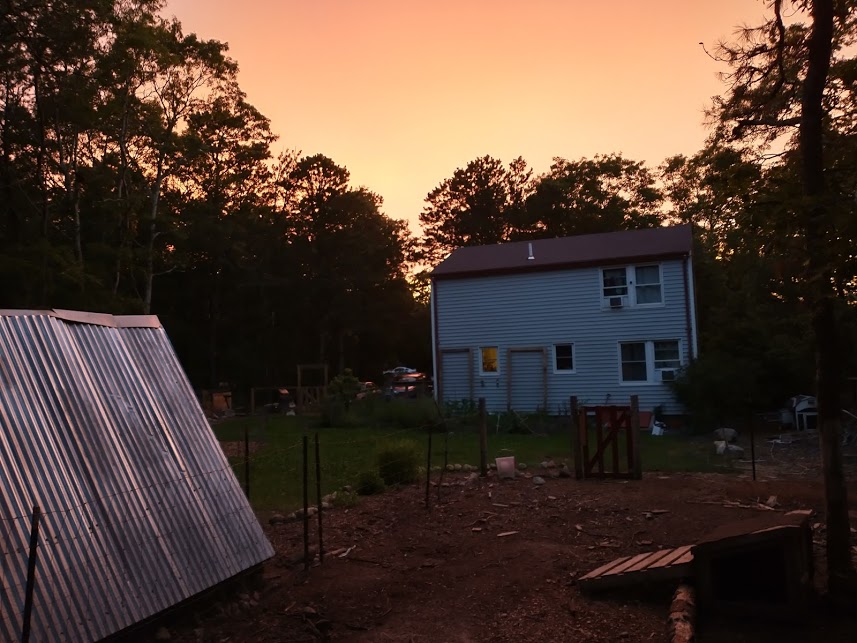
A view of the rest of the homestead. That A-Frame is a chicken/duck house I built last summer.

Images via Natalie C. McKee
Simple, quiet living.
Images via Natalie C. McKee
Details:
- 8×6 Shed
- Metal shed-style roof
- Total cost: ~$400
- Siding: $200-ish
- Metal Roofing: $117
- Framing Lumber: $85
- Screws (that we didn’t already own): $7
- Hinges/lock: $20
- Took about a month to build, but could be done in 3 solid days without interruption
Related stories:
- Family Turns Shed Into Their $15,000 Tiny Home + Interview
- $15k Barn Shed Tiny House
- Barn/Shed Tiny House Conversion For Sale, Under-$20k
- Debt-free With A Shed Turned Tiny House
You can share this using the e-mail and social media re-share buttons below. Thanks!
If you enjoyed this you’ll LOVE our Free Daily Tiny House Newsletter with even more!
You can also join our Small House Newsletter!
Also, try our Tiny Houses For Sale Newsletter! Thank you!
More Like This: Tiny Houses | Shed Tiny Houses | Cabins | Homesteads
See The Latest: Go Back Home to See Our Latest Tiny Houses
This post may contain affiliate links and/or sponsored content.
Natalie C. McKee
Latest posts by Natalie C. McKee (see all)
- Two Bed Two Bath 10×40 Tiny House - June 16, 2024
- Southern Heights Small House Village - June 16, 2024
- Little Italy Tiny House Community: Corcoran, CA - June 16, 2024
What a handy and unique storage space! My family would sure benefit by having something like this. I personally like the natural, reclaimed woods, etc. Very nice indeed!!!
Thank you so much! The rough cut pine weathers really beautifully. I may stain it once it all dries out, but even if I don’t it fits our rustic homestead 🙂
Very nice job! Great homestead, too.
Thank you so much, Sonya!
I love the use of reclaimed materials! It looks like a great place to store tools, etc.
But some STONG words of caution:
Storing feed and soft materials in a shed/ in containers that are not rodent proof is going to cost you headaches, unpleasant cleanups, and lost feed. Mice adore bales of hay, and they can easily scale the wood cladding up to that nice open space below the roof. They will easily hop down from above and make a little nest in your hay, gorging themselves on those bags of sweet feed after they nibble through the paper sacks. They will pee on the feed, too — spoiling it.
Get VERY serious about rodent prevention. Where you find them, you will also find predators = snakes (they can squeeze through tiny openings in your shed).
Do yourself a favor and visit some neighbors who also have chickens, and you will see they have rodent proof containers (aluminum cans with tight fitting lids) to keep it fresh. The cans must be stored out of the rain, off the ground. Plastic containers won’t work — rodents will chew right through them.
Store your clay pots upside down if you don’t want critters to greet you when you reach for them.
My husband plans to put some metal mesh all around the top to allow for ventilation, but to keep out critters. We definitely have some securing to do 🙂 We keep feed in sealed metal bins near each animal shelter for immediate use (learned the hard way with plastic that the squirrels ate through). The feed had been in our basement so I am happy that if we have mice they will now live OUTSIDE ha. We also have a mouser cat, and she brought us two just yesterday.
I also built a small shed using pallets and reclaimed panels for the walls. My husband and son helped me build an 8 by 12 shed which I envisioned as a small cabin but chose to use for a chicken shed. I just need to figure out how to move photos from my phone to send to post them. It can be done and for a reasonably low cost. With the rise in new lumber prices, it is great to find bargains and make used materials work for your purpose. Good job!.
Oh I would love to see it, Joyce! Can you email yourself the pictures?
Hi Joyce! You may be able to upload your photos directly from your phone using the form right here: https://tinyhousetalk.com/share-your-tiny-house
Alex, I tried to send you photos by email. Did you get them? Joyce
Hi Joyce! I haven’t seen anything come through from you. Can you resend to tinyhousetalk@gmail.com?
What? No bikes? I thought it was obligatory for a shed to have at least one push-bike inside ?
Seriously though, great job! It looks like a really solid and functional structure, at low financial and environmental cost, because its built with reclaimed materials. Well done, you should be rightly proud of yourselves here!
Haha oh there is a smaller lean-to-style shed on the side of the driveway for all the kids’ bikes and plastic outdoor toys! That was another summer project LOL But thank you so much! I am very happy to have it complete.
Amazing!
This looks great! It is awesome to be able to make it yourself.
There’s nothing more rewarding than building something yourself!
Just goes to show people that you don’t need to spend 100k to build something. If times ever got tough you a single person/couple could actually live in that, it wouldn’t be ideal or comfortable but it COULD be done and it cost you $400 to do it.
Job well done! Congrats!