This post contains affiliate links.
Building a Mortgage-free Tiny House by the Seat of My Pants – Part 2 – by Shirley Loomis
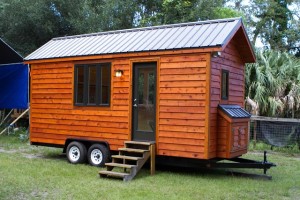
Arriving at my tiny house daily was so much more pleasant once the outside was complete. It looked like I was working on something real, no longer just a picture in my mind’s eye. An added benefit of having the exterior complete was that I could work inside with an added degree of warmth and protection from the elements.
Prior to tackling the inside I looked at a lot of layouts I had seen published in books and online, examined my own existing furniture, considering how I might be able to repurpose it for use inside my tiny house. Being a book hound my bookcases were definitely something that would be put to use. As you look at your space, always keep in mind how you live, the kinds of things you like to do, how you make your living, and what you readily have on hand that you can tailor to meet your needs.
Related: Woman in her 50s Builds Tiny Home (original)
And: Building a Mortgage-free Tiny House By the Seat of My Pants (part 1)

All Images © Shirley Loomis
Given the height, the interior was very roomy but not roomy enough for a sleeping loft. Since I’m not getting any younger and already have bad knees, a sleeping loft wasn’t really on this klutz’s radar so that was a non-issue. Front and rear lofts were intended for storage.
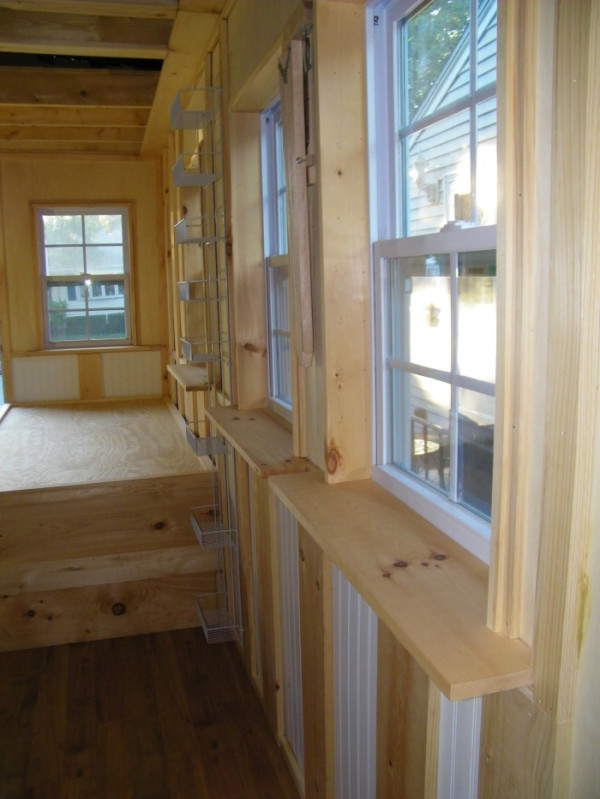
Condensation can be an issue in tiny homes so I opted for spray foam, purple board, and this stuff that looks like quilted aluminum foil (depending on what portion of the building I was working on at the time). The end result was an exceptionally tight building with no leaks or condensation. Seven windows provided excellent ventilation and cross breezes. In short, she’s quiet, cozy, naturally warm in the winter and cool in the summer.
Flooring is engineered flooring designed to withstand moisture so I could use it throughout the entire building, including the bathroom area. Interior walls are made using very lightweight woods with a faux copper ceiling. Overhead beams allow for additional storage options.
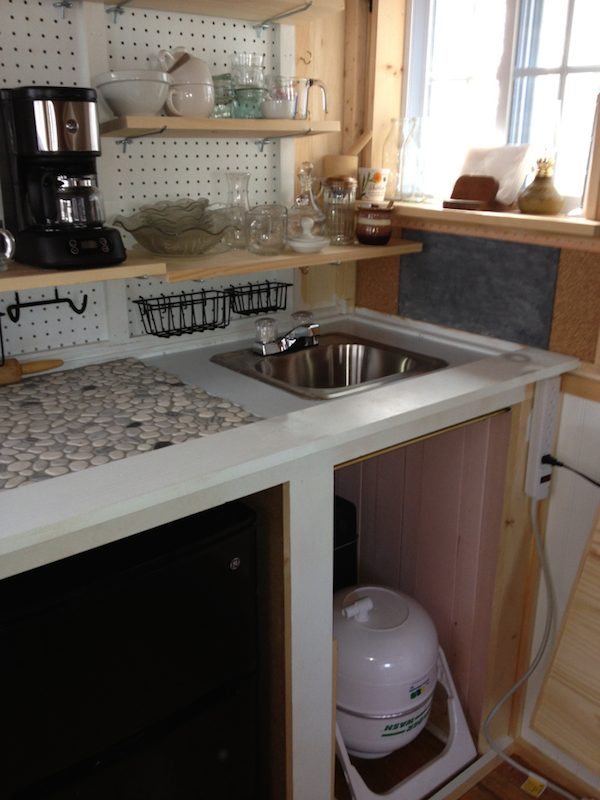
Not being a plumber or an electrician I decided to make sure that anything I did with those two systems was going to stay visible and accessible in case somewhere down the road revisions or repairs needed to be made. Yes, I know I gave up something on the aesthetic appeal here but it gave me up front security and can always be modified further down the road as my skill level increases.
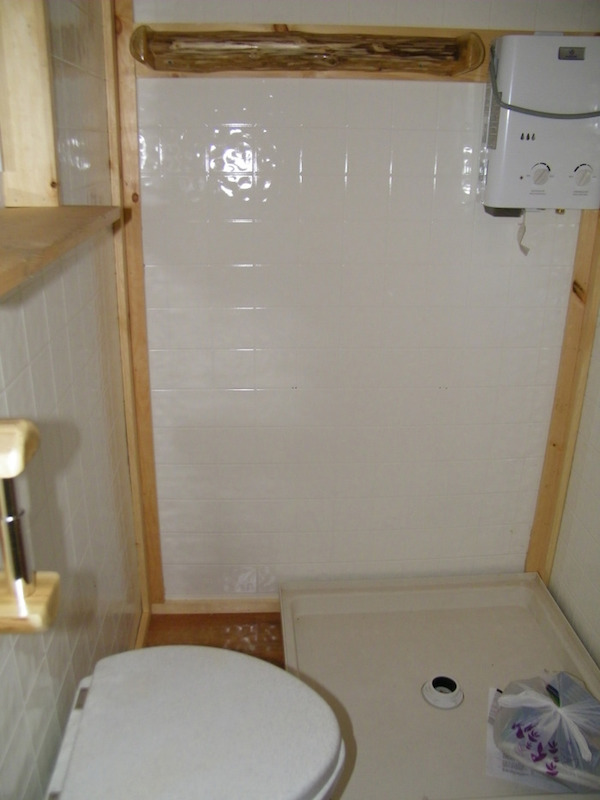
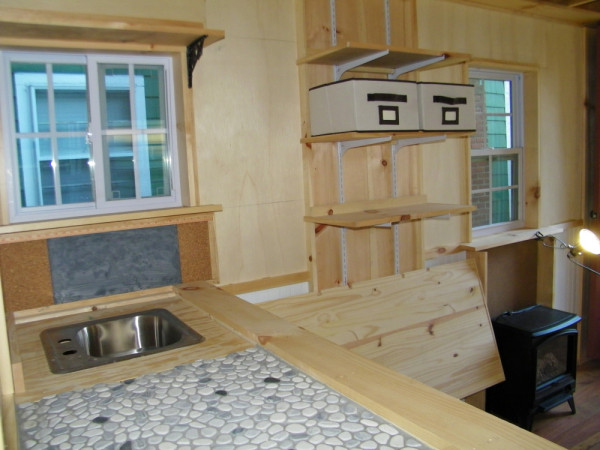
Gravity is my friend. It lets me have several options where my water collection and usage are concerned. My shower can use a gravity fed solar shower, water from an exterior supply such as a hose, or pumped in from a reservoir (going through a filtration system that would accommodate a multi-bedroom house). The sink can use a gravity fed system, or supply from an exterior source.
No black water exists anywhere.
As much as possible without sacrificing safety and comfort this little haven is eco-friendly and very low impact.
Many books exist about how to build your own composting toilet and maybe somewhere down the road I’ll give that a go but I wasn’t ready to take that project on just yet so opted for a composting toilet often used on boats. Anything blessed by the Coast Guard for use on the water had to be good enough to meet my needs.
Interior lighting is done by using rechargeable battery operated LED lights with one light being electrical. I strung a series of tiny white lights on an artificial plant for a warm relaxing lighting effect.
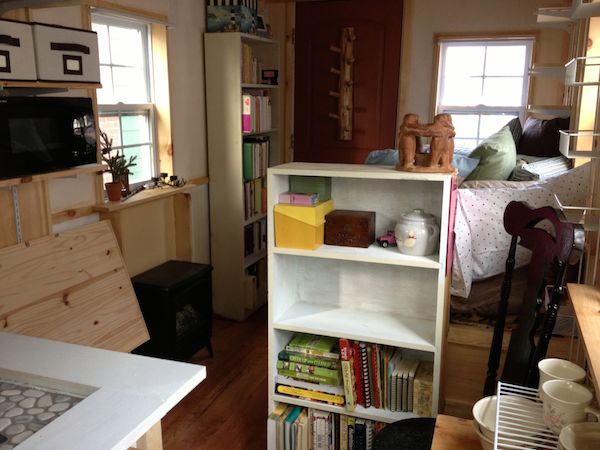
When I built this tiny house I was living in a 320 square foot apartment. After building out the interior, my tiny house had more actual storage space than my apartment even though the whole home was about one third of the size.

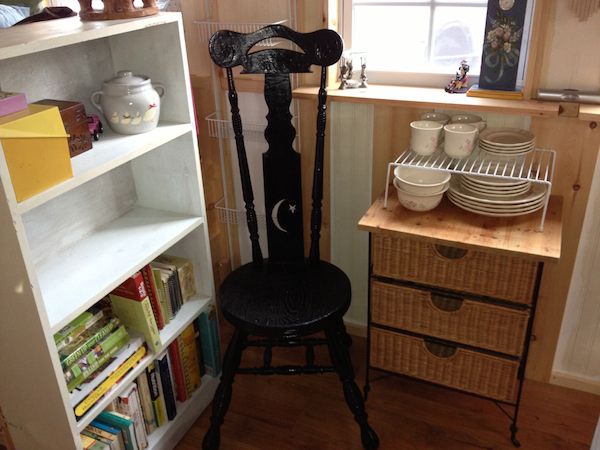
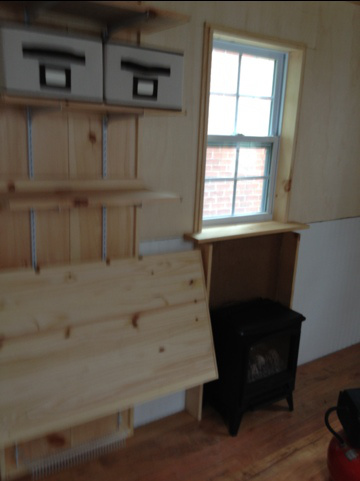
Above is a clothes dryer and below a storage rack.


All Images © Shirley Loomis
Heating can easily be accomplished by using either a propane boat fireplace or an electrical fireplace. For safety sake and to protect me from anything I may have overlooked in the learning curve there is a carbon monoxide and smoke detector as well as two very easily accessible fire extinguishers. I was even given the thumbs up by one of our local firemen who took a peek, very much liking what he saw in both aesthetics and safety.
This little tiny house is not lacking in comfort. I have a two burner hotplate/stove; counter top convection oven, refrigerator, toaster oven, coffee maker, toaster, microwave, TV and stereo. As someone who has camped for years, I also have enough gear to set up an outdoor propane kitchen and expand my living space into the open air.
I like my stuff. I’ve worked hard to earn it, hard to keep it, and if it’s something I use there is absolutely no reason to rid myself of it. I love cozy, cuddly, rustic cottagey, and comfy. My tiny house reflects that. The colors I chose are light and airy. The daybed/sleeping area is loaded with pillows. Beneath can be found three big storage bays, and beneath that, a trundle bed for guests who may happen by. My lower bookcase stores cookbooks and serves as a divider wall between the sleeping area and kitchen, and clothes are stored in a narrow dresser that was a great little yard sale find. The kitchen area has painted pegboard because I know I will continue to add and delete. The pegboard allows me to continually reconfigure my kitchen storage space.
And by adding on a deck, I can further expand my interior space to flow into an outdoor living area. Stay tuned.
Learn more about Shirley at her blog www.coppertinwoodandwill.wordpress.com. Even more interior construction photos here.
If you enjoyed this story you’ll absolutely love our free daily tiny house newsletter with even more inspiring stories like this!
Related: Woman in her 50s Builds Tiny Home (original)
And: Building a Mortgage-free Tiny House By the Seat of My Pants (part 1)
This post contains affiliate links.
Alex
Latest posts by Alex (see all)
- Escape eBoho eZ Plus Tiny House for $39,975 - April 9, 2024
- Shannon’s Tiny Hilltop Hideaway in Cottontown, Tennessee - April 7, 2024
- Winnebago Revel Community: A Guide to Forums and Groups - March 25, 2024


Good practical approach and advice. I’m with you on cozy, cuddly, rustic cottagey, and comfy and I too like my stuff.
Thanks for taking the to check it out Alice!
Like the accuracy 🙂
For me, the most important part is everything related to condensation (I am going to build and live in my tiny house in extreme cold environment). May I ask you to make a special post related to the subject? (How, what materials, etc.) If you made a pictures during your construction process would be good…
Thank you for sharing.
Beautiful job!
Feel good, and have a pleasure living in your house.
I always loved the idea of that tiny washer ever since it came out… I can still remember seeing the infomercial. Its so cool… I always wanted to ask how it is using it, especially in a tiny house?
I had a washing machine just like that in Musa Qalah District, Helmand Province Afghanistan. It worked very good as long as you did not overload it and really rinsed the clothes well. I would do 100 turns in one direction and another hundred turns in the opposite direction for wash, drain and refill with clean water, and then repeat for the rinse. Well, to be truthful, I never had to crank the thing as the Afghans were so intrigued by it, they insisted on cranking it.
Beautiful! Nice job dearheart, may God bless you with many years in your tiny house. Happy Trails!